How to Enable Printer Settings (On Mobile)
The Printer Settings feature allows you to connect a Bluetooth thermal printer to the Timart Business App so you can print receipts with your business details.
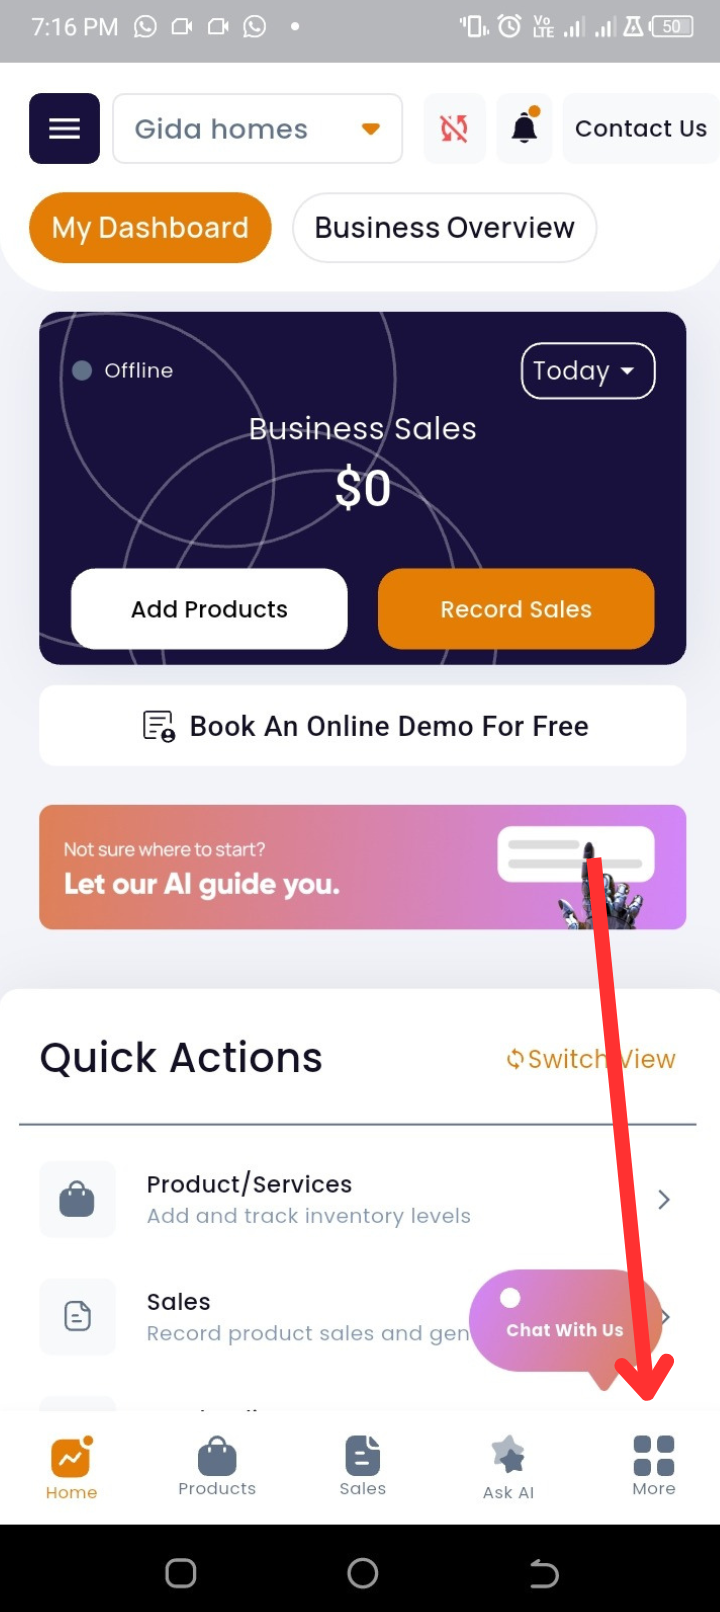
Step 1: Go to homepage
Look at the bottom navigation bar.
Step 2: Tap on More
This is the last icon on the navigation bar.
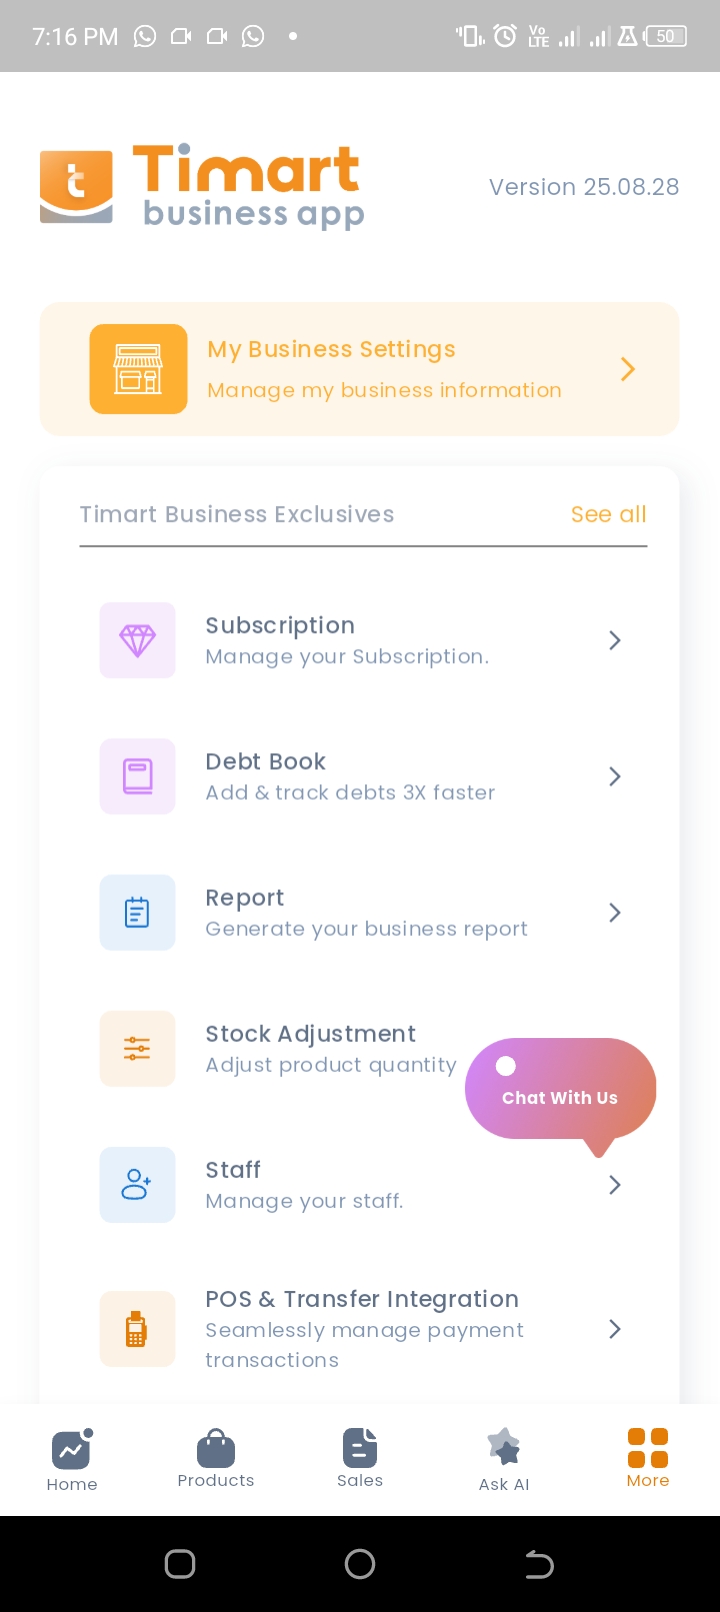
Step 3: Tap on My Business Settings
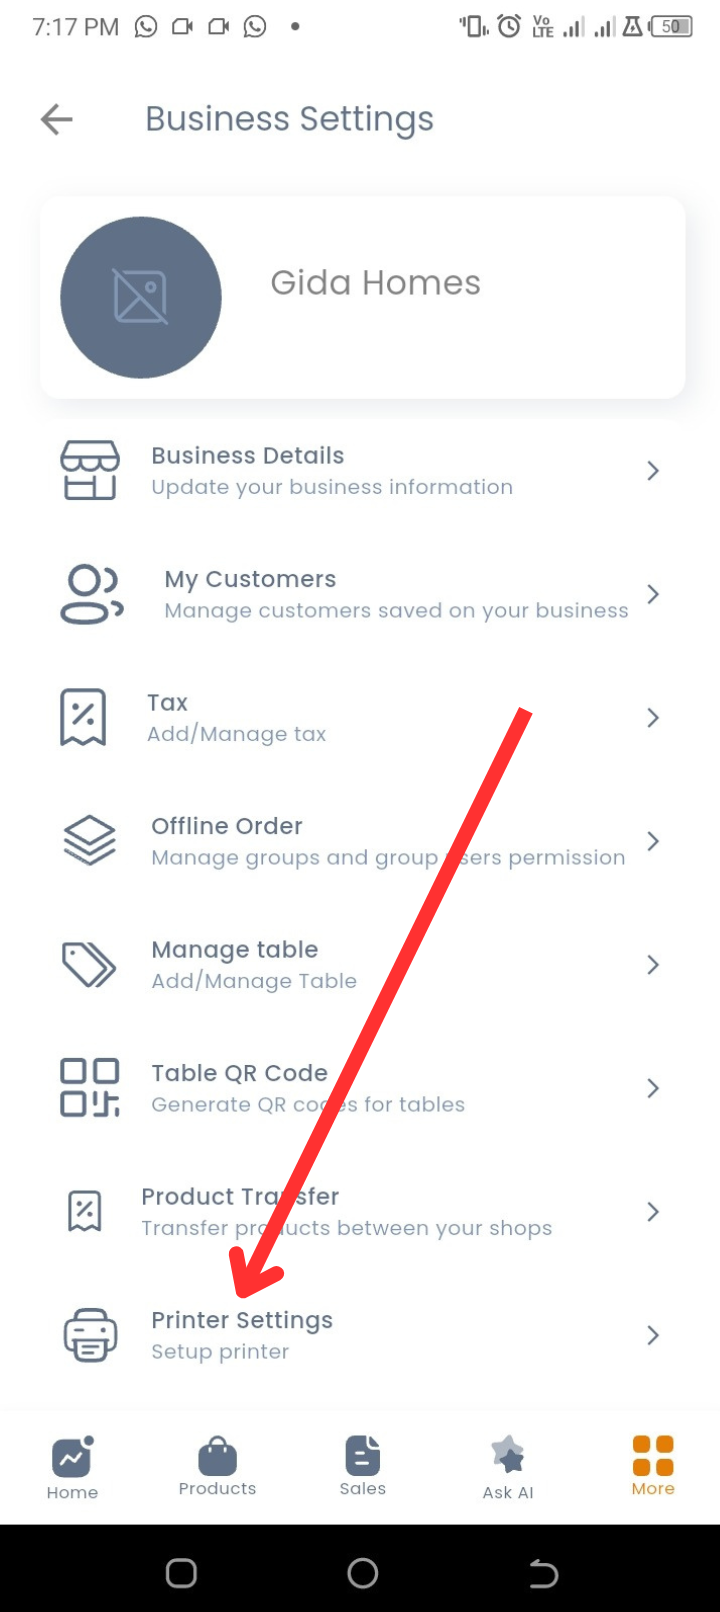
Step 4: Tap on Printer Settings
This opens your printer setup page.
Step 5: Allow Permissions
Grant the necessary permissions when prompted.
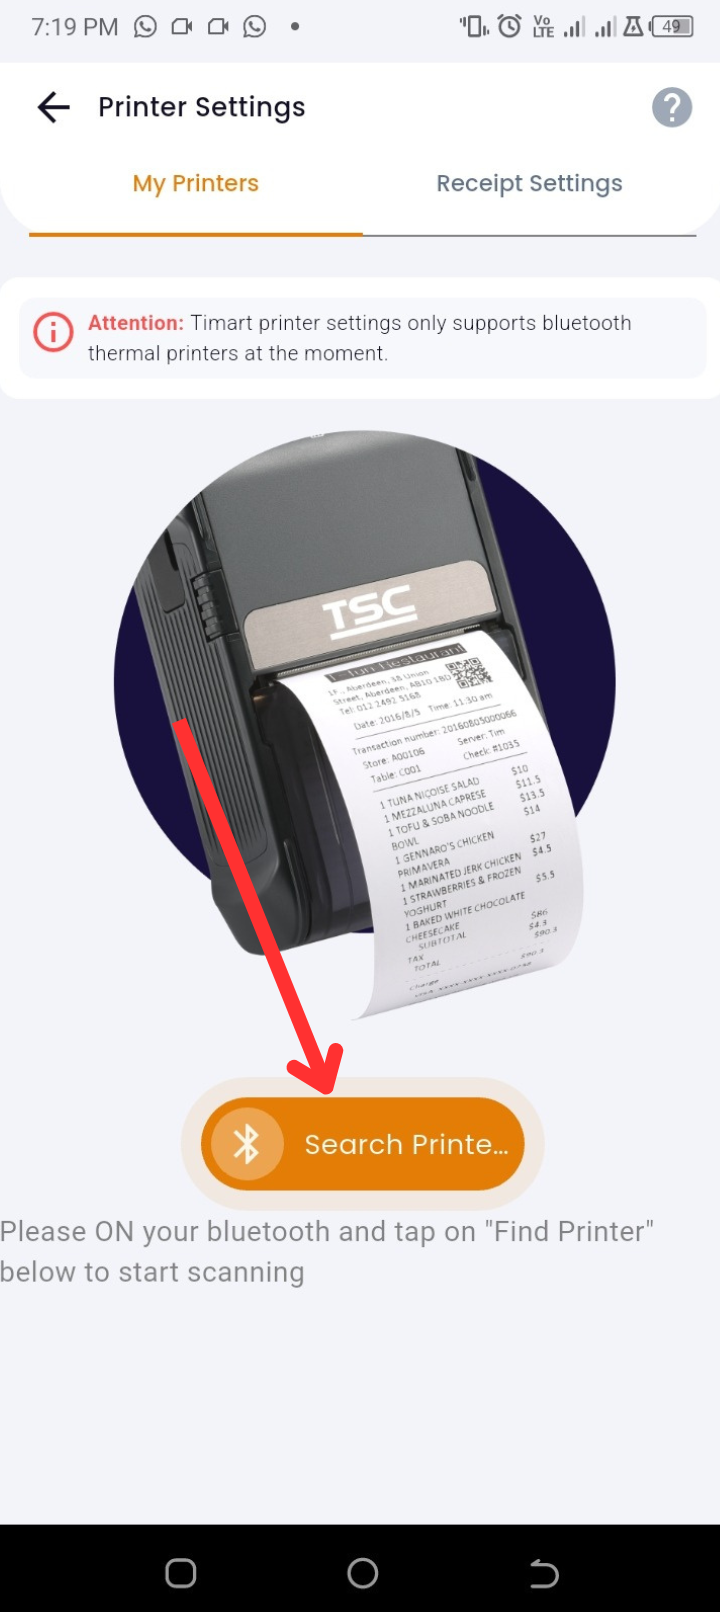
👉 Note: Timart currently supports Bluetooth thermal printers only.
Step 6: Tap on Search Printer
Ensure Bluetooth is turned on.
Step 7: Select your printer device
Tap on your device name to connect.
Step 8: Test Print or Set as Default
-
Run a test print to confirm the connection.
-
You can also set the device as your default printer.
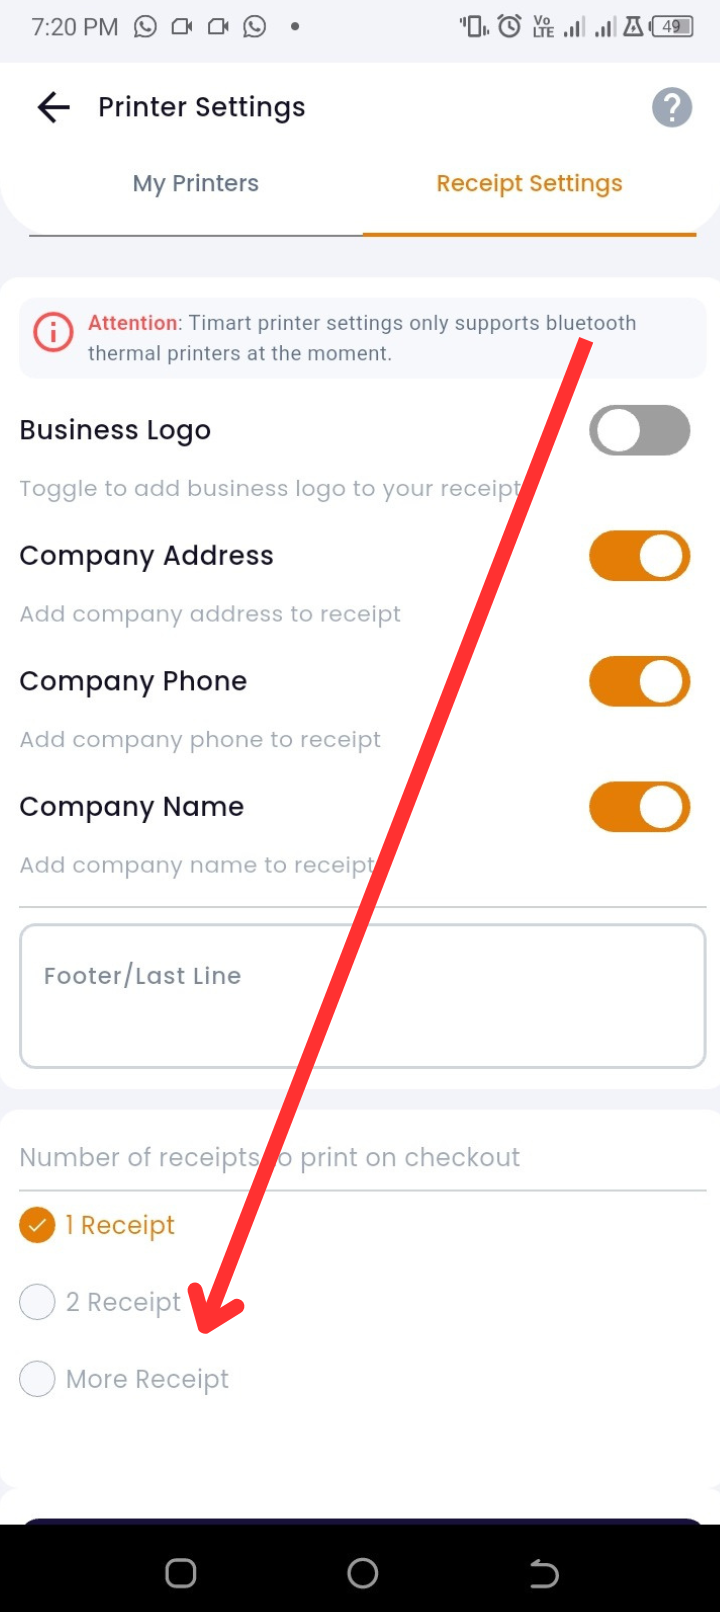
Step 9: Configure Receipt Settings
Tap on Receipt Settings to manage:
-
Business Logo
-
Company Address
-
Company Phone
-
Company Name
-
Footer Note
-
Number of receipts to print at checkout
💡 Tips
-
Keep your Bluetooth turned on when using the printer.
-
Always test print after connecting to confirm setup.
-
Add logo and contact details for a professional receipt look.
❓ FAQs
Q: What printers does Timart support?
A: Only Bluetooth thermal printers are supported at the moment.
Q: Can I connect more than one printer?
A: Yes, but you an also set one as the default.
Q: Can I customize the receipt format?
A: Yes, you can adjust logo, footer, and number of copies in Receipt Settings.
🔧 Troubleshooting
-
Printer not showing up when searching
→ Ensure Bluetooth is on and the printer is discoverable. -
Receipt not printing
→ Confirm you’ve set the printer and paper is loaded correctly. -
App crashes when connecting printer
→ Restart the app and try again. If issue persists, contact support..