How to Add an Invoice on Mobile
Steps to Add a New Invoice
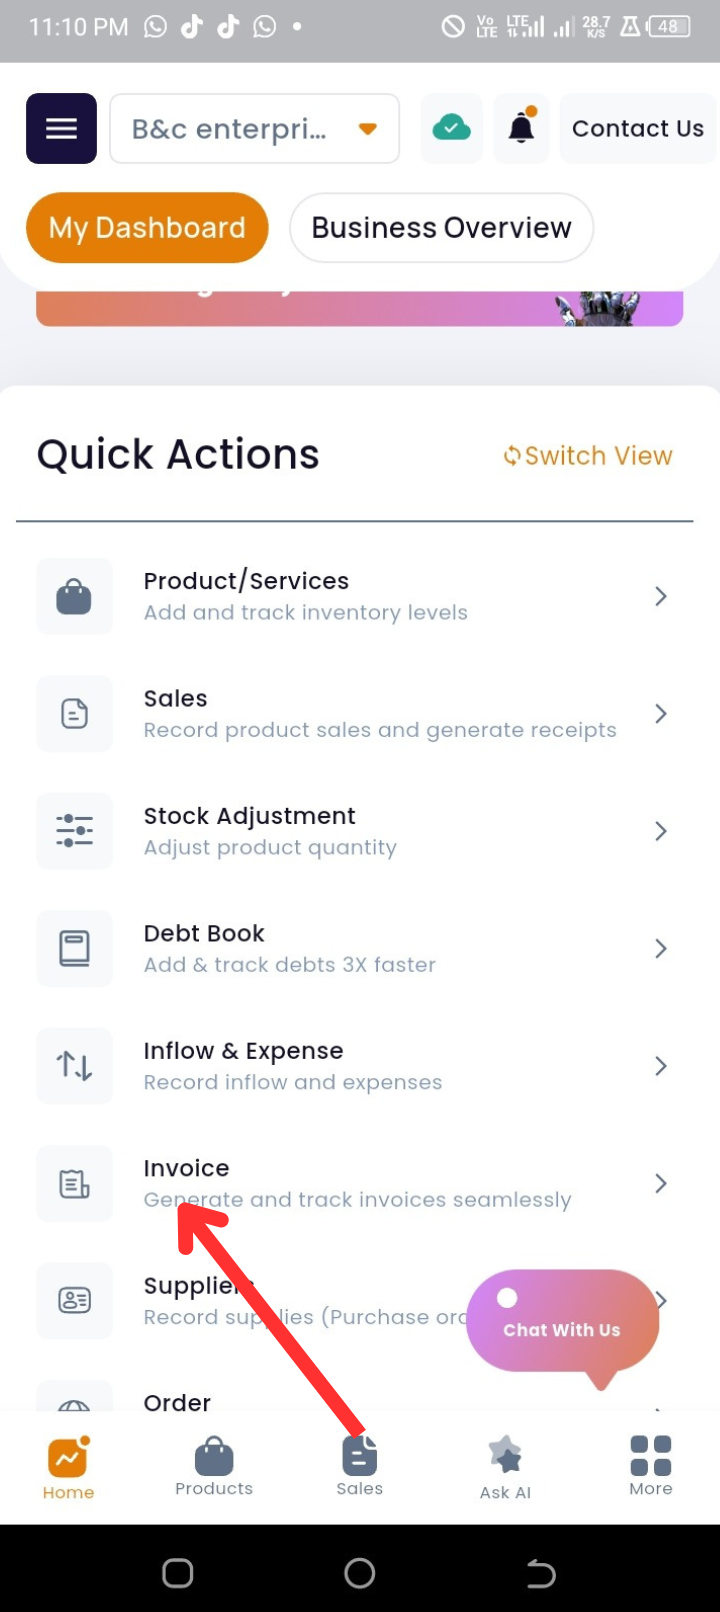
Step 1: Go to the homepage.
Step 2: Tap on Invoice under Quick Actions.
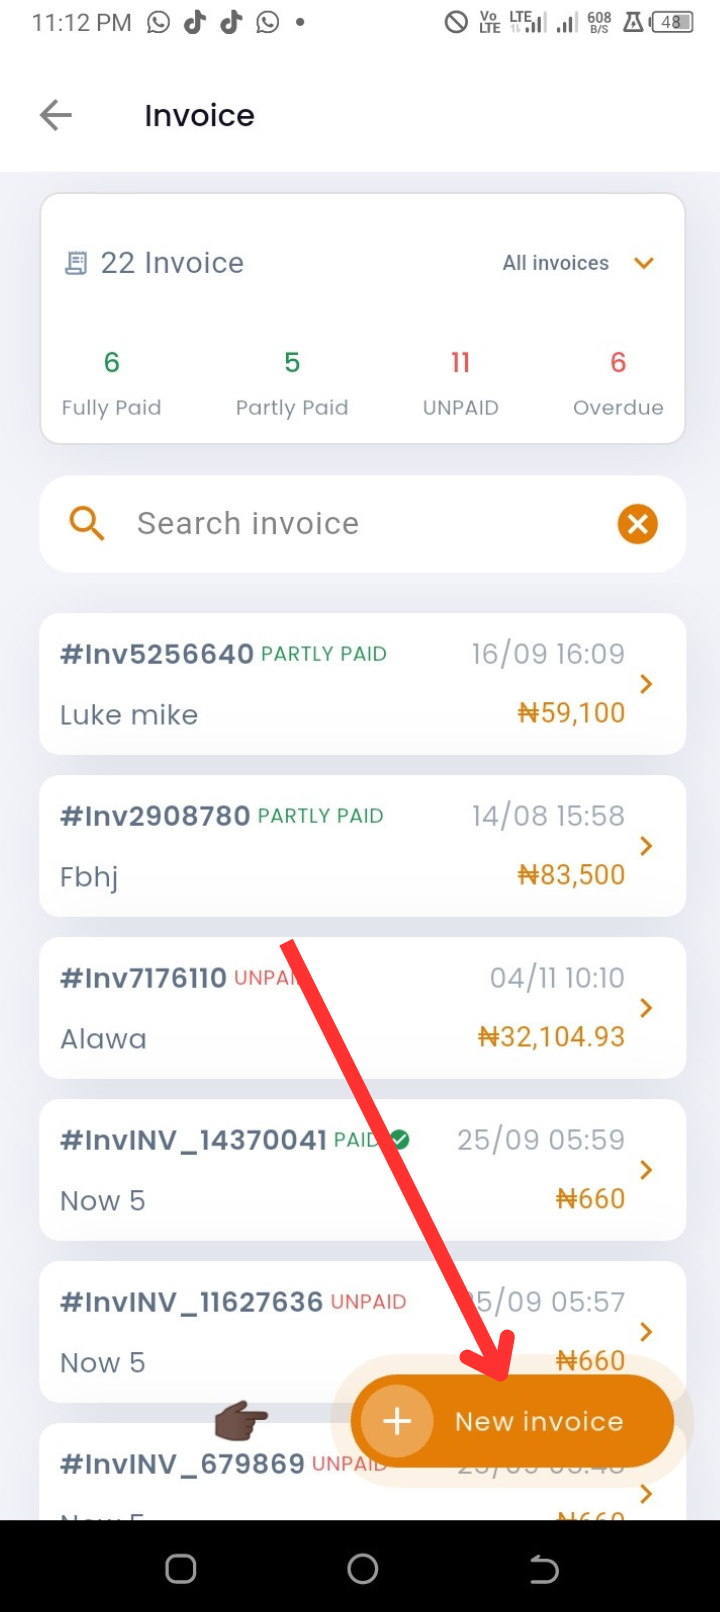
Step 3: Tap on +Invoice.
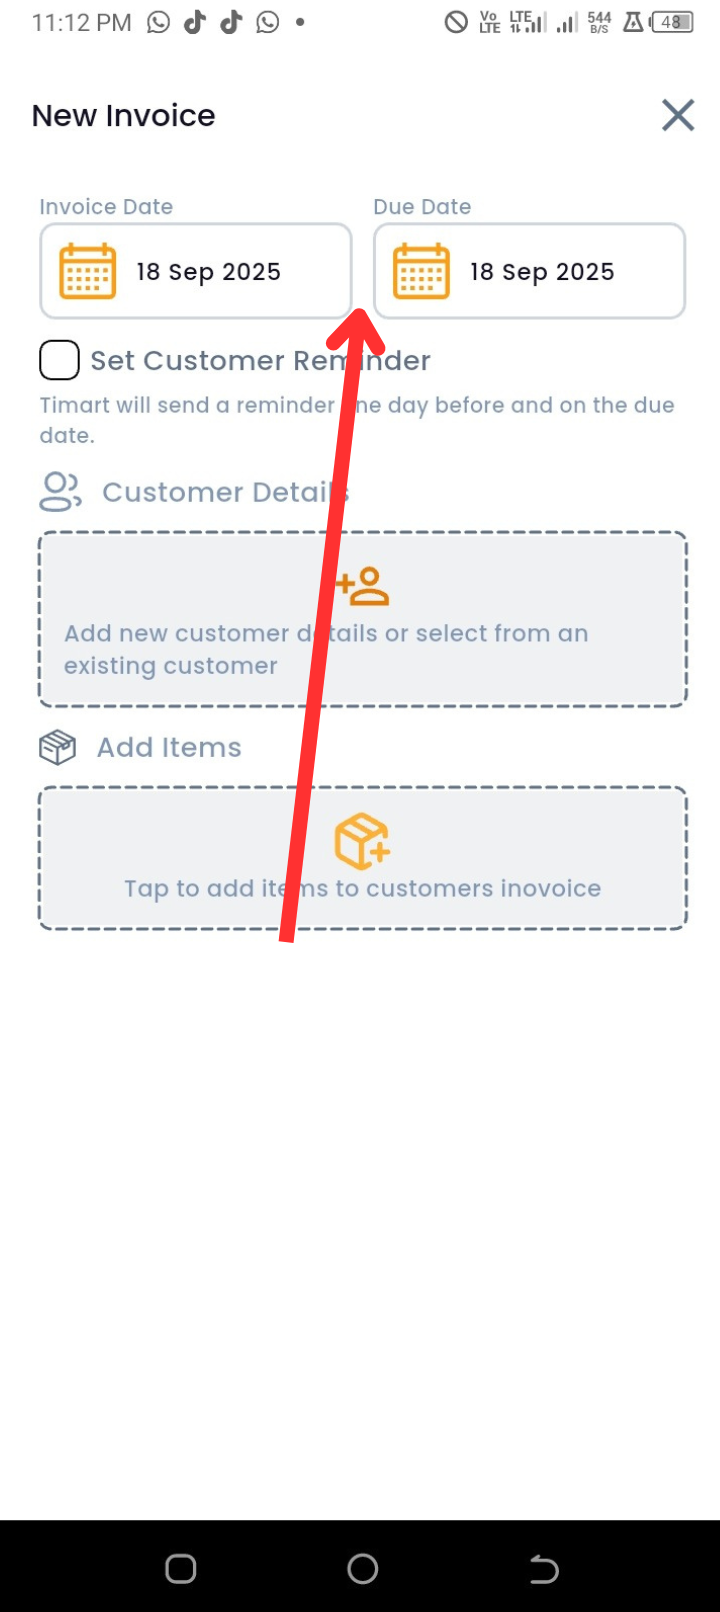
Step 4: Enter the Invoice Date (the date the invoice is created) and the Due Date.
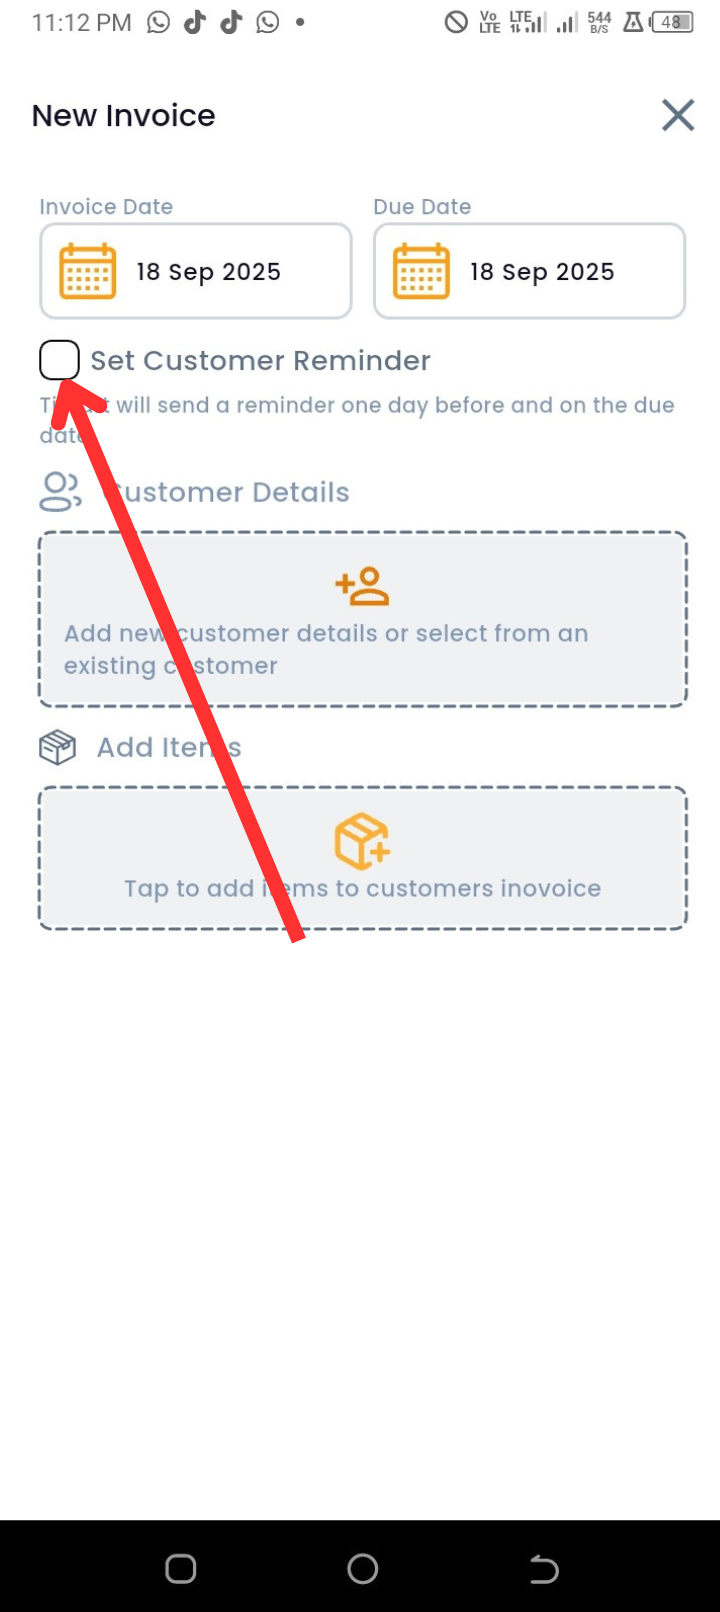
Step 5: Tap the checkbox beside Set Customer Reminder to activate automatic reminders.
Step 6: Under Customer Details, tap the contact icon to:
-
Select an existing customer,
-
Add a new customer, or
-
Import directly from your phone contacts.
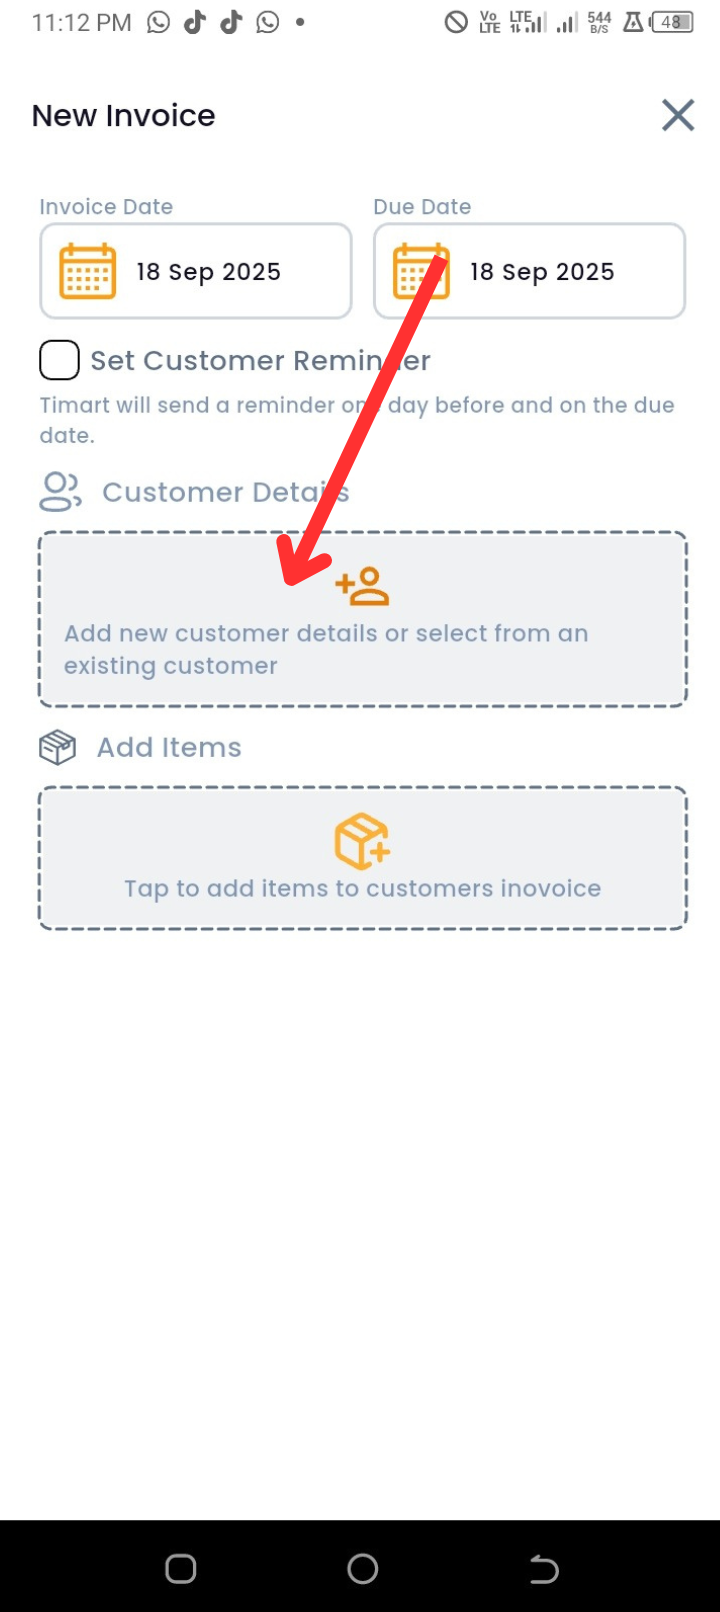
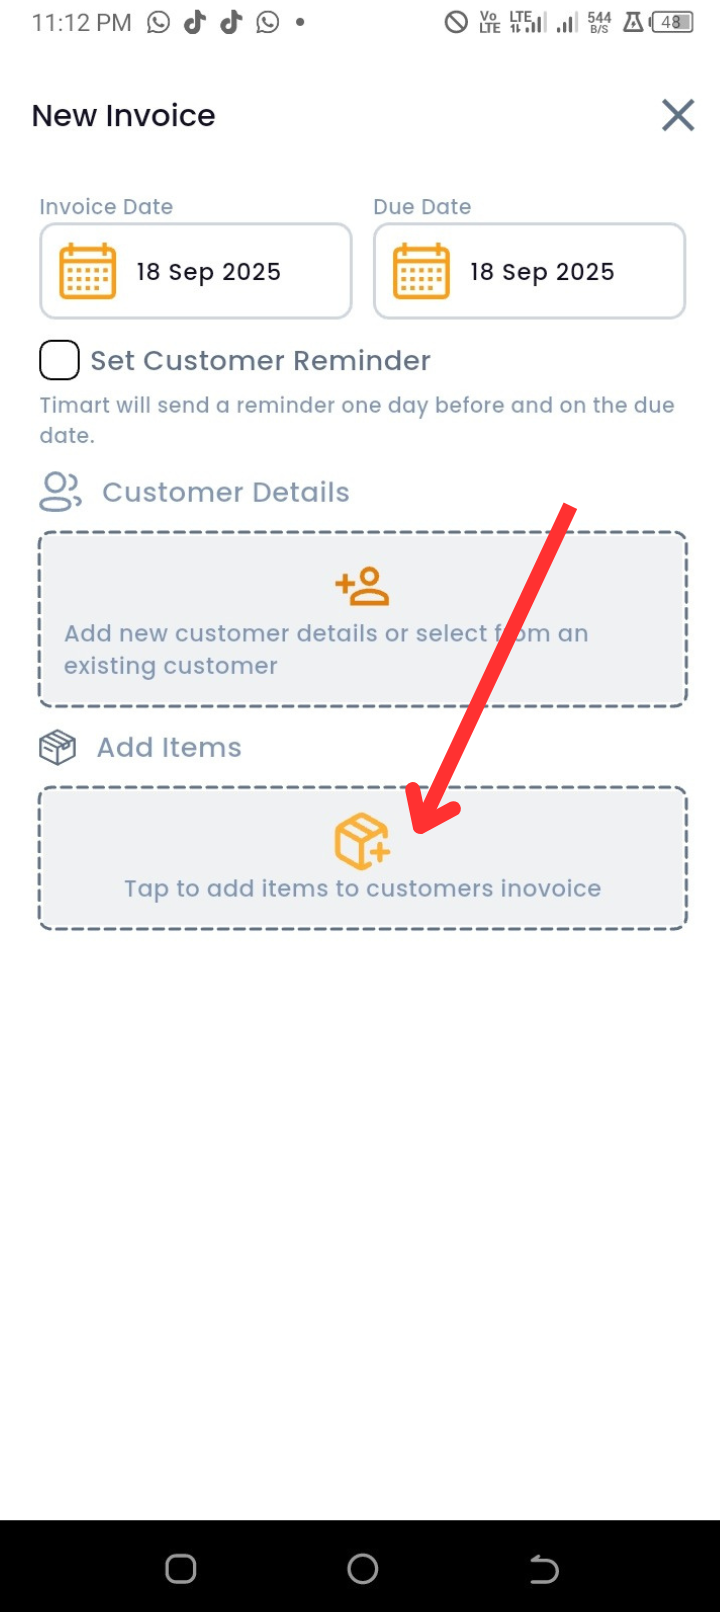
Step 7: Tap on the Add Items icon to add products or services.
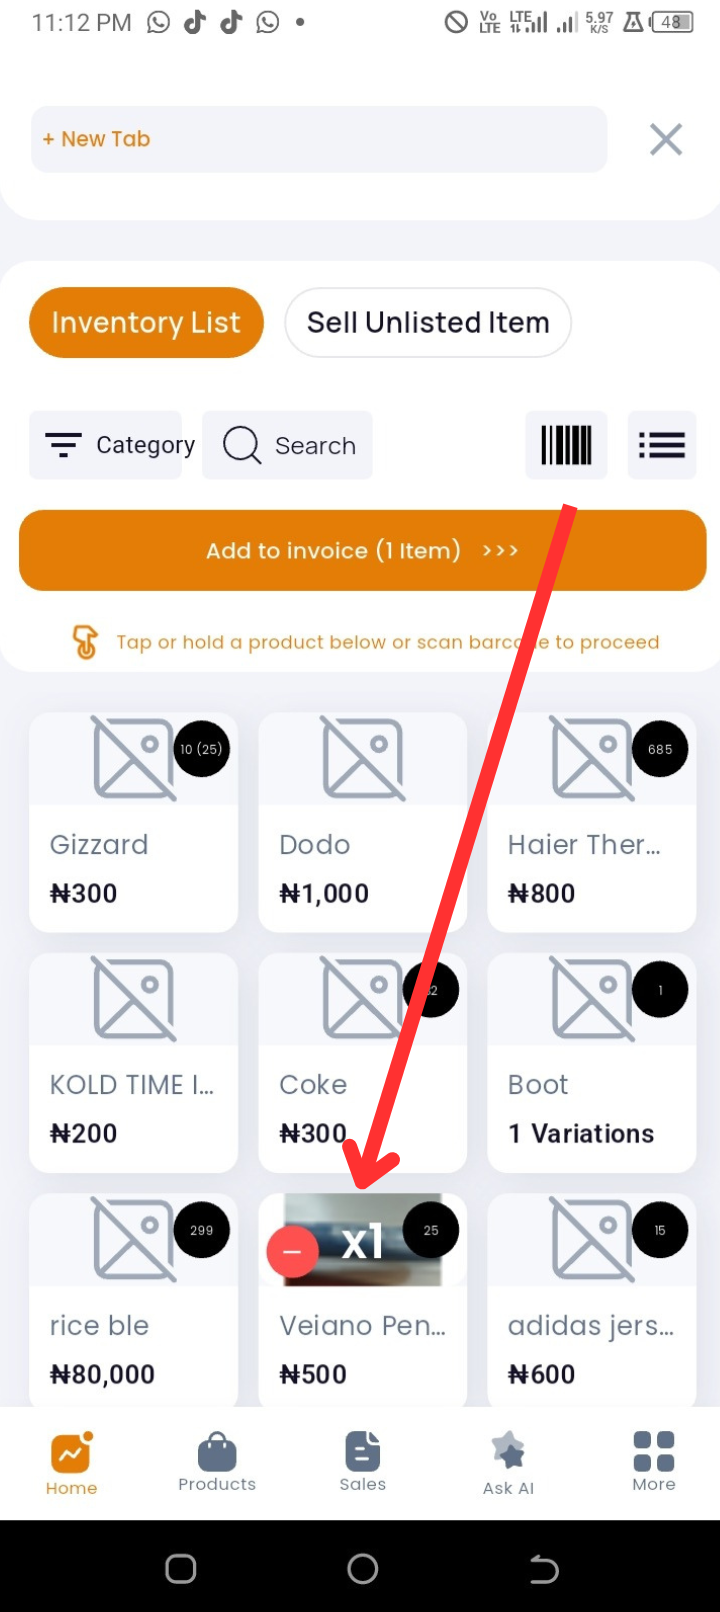
Step 8: Select the product and tap Add to Invoice.
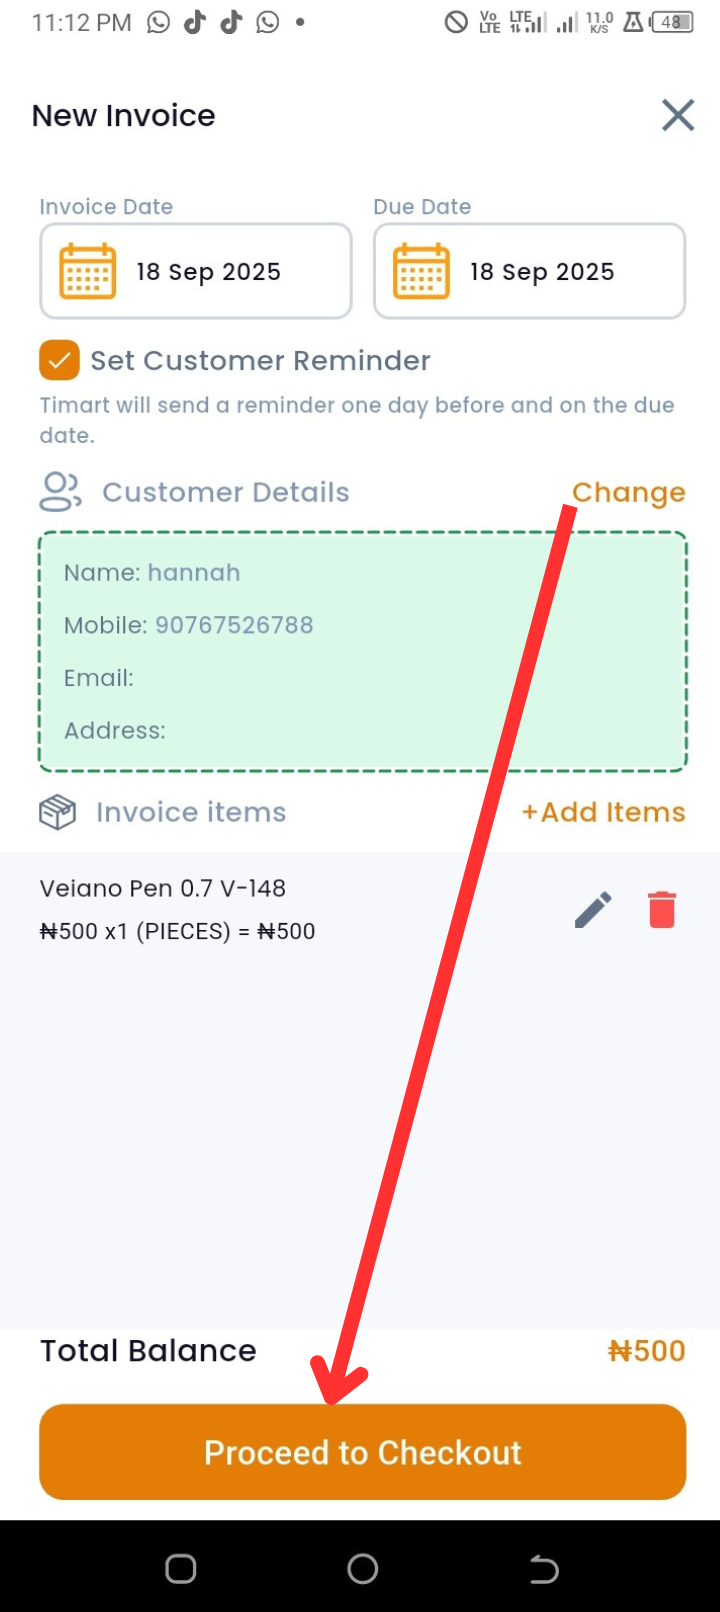
Step 9: When done, tap Proceed to Checkout.
Step 10: Select Payment Status: Paid, Unpaid, or Partly Paid.
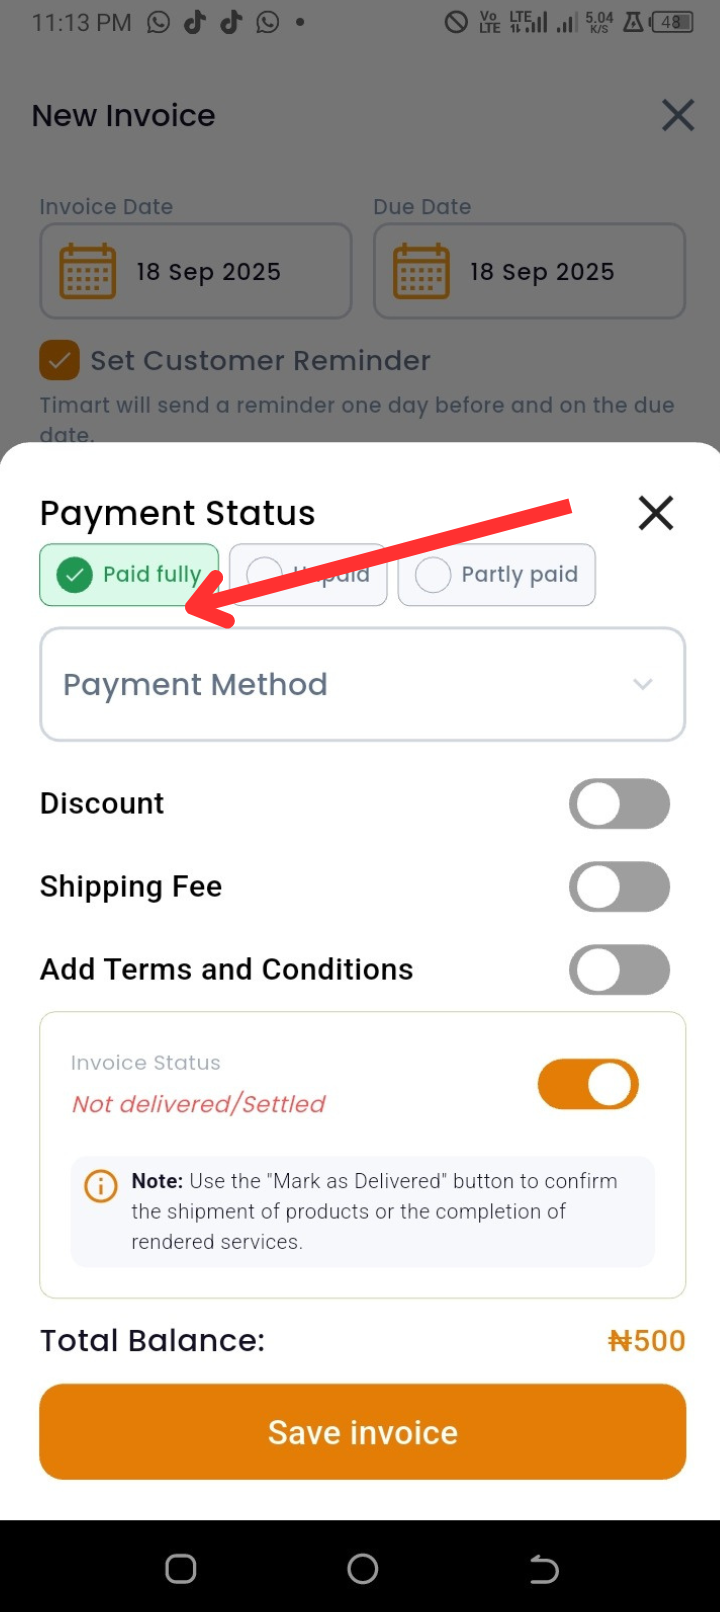
Step 11: Select the Payment Method: Cash, POS, or Bank Transfer.
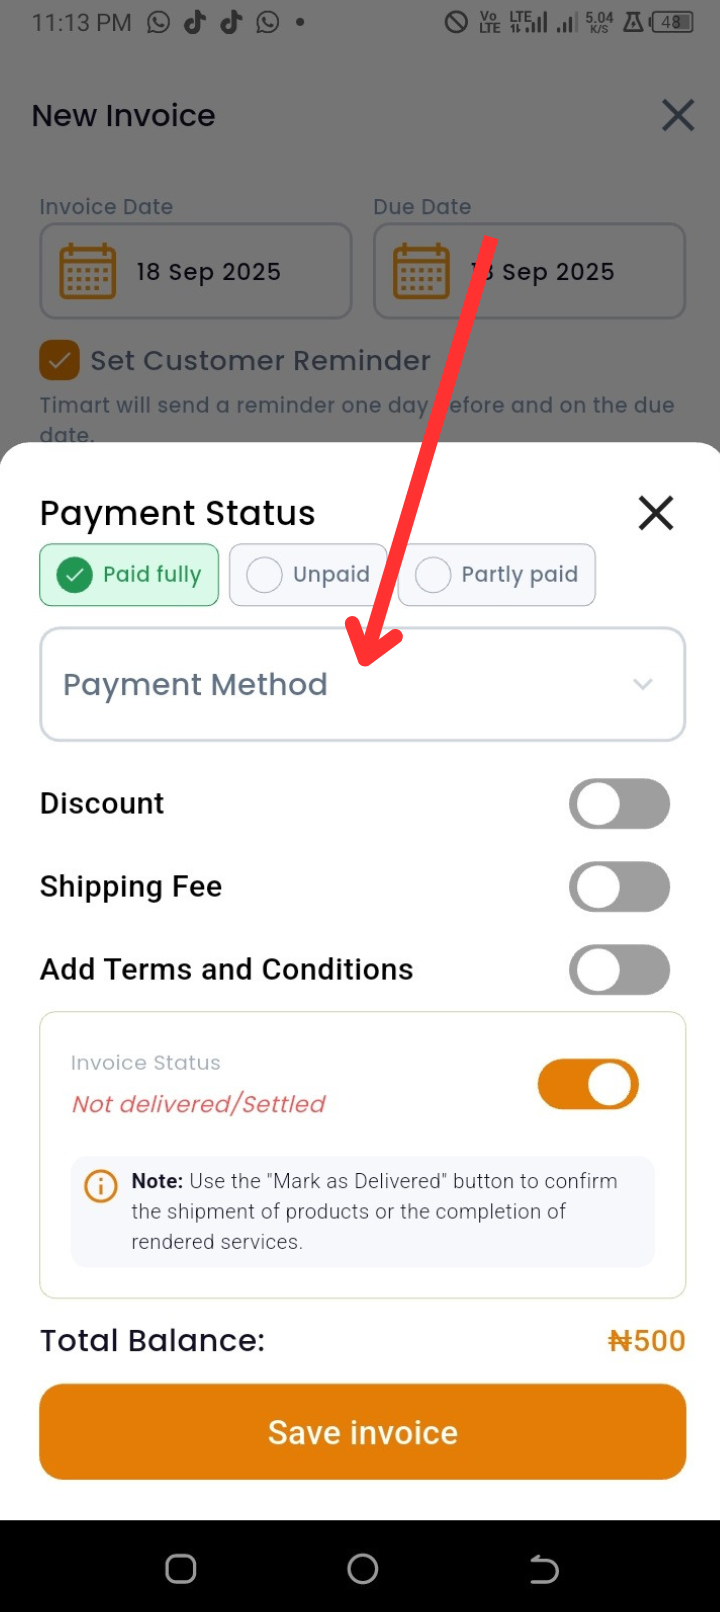
Step 12: (Optional) Enable Discounts, Shipping Fees, or add Terms and Conditions.
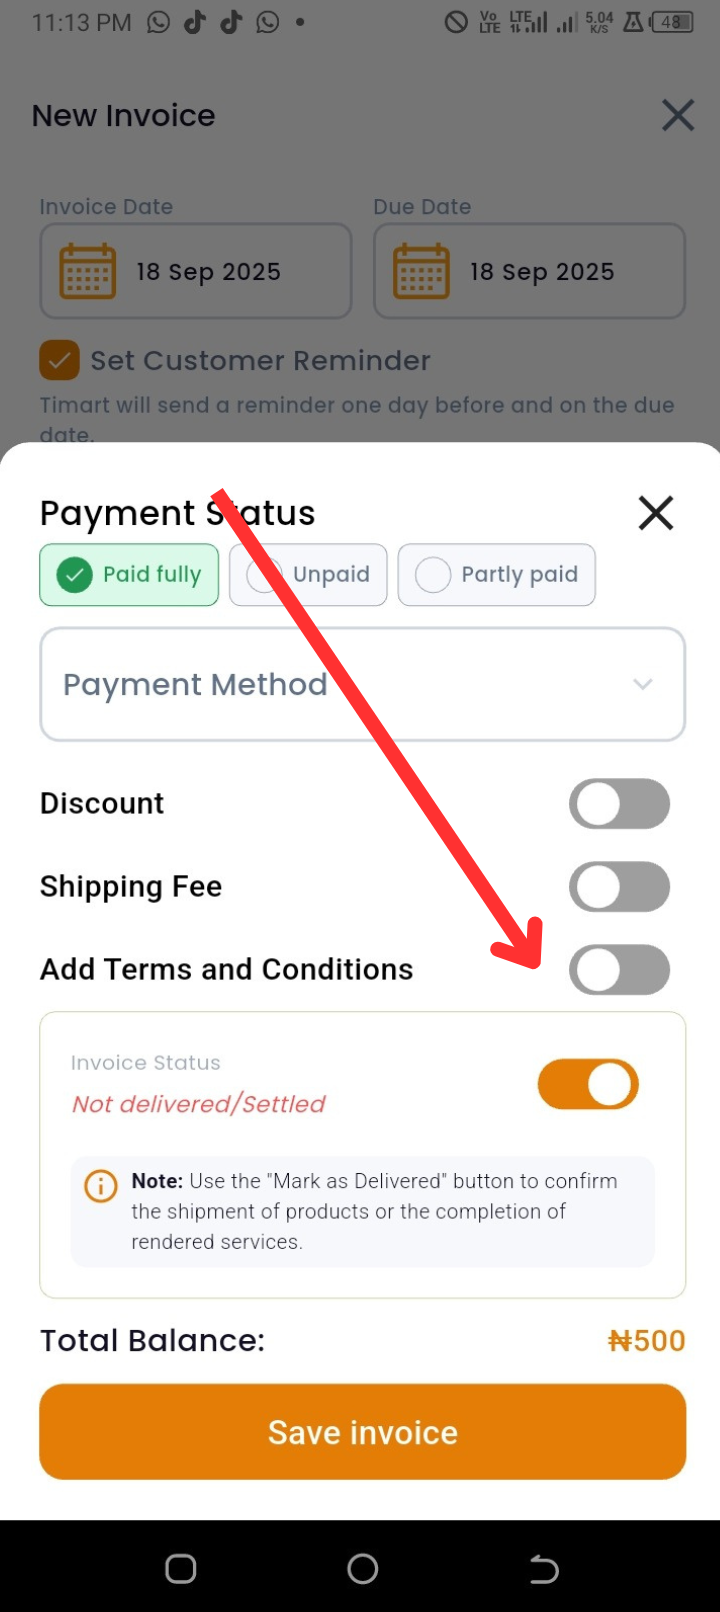
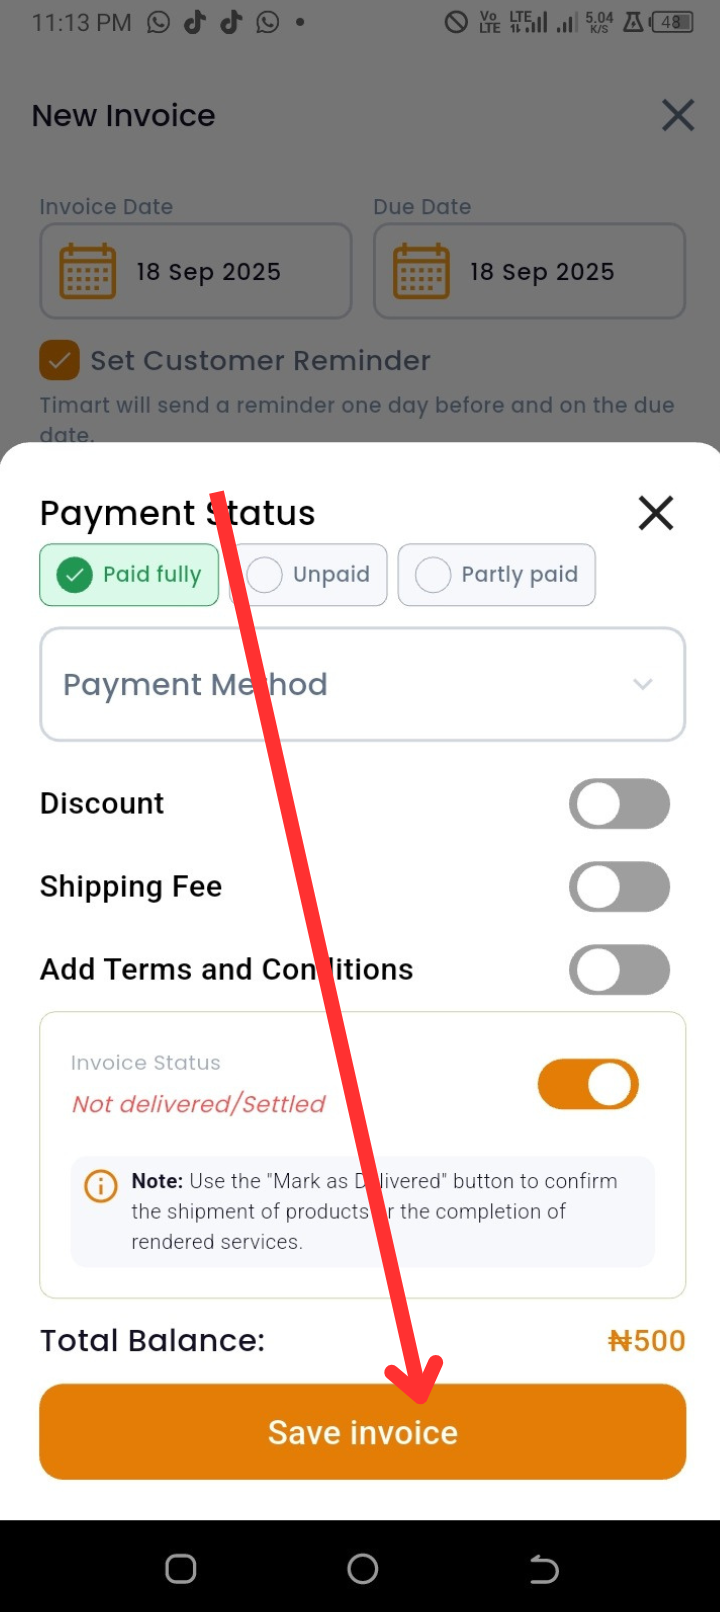
Step 13: Toggle the option beside Not Delivered/Settled if the shipment has been confirmed.
Step 14: Tap Save Invoice to complete the process.
Steps to Add a Partly Paid Invoice
Step 1: Go to the homepage.
Step 2: Tap on Invoice under Quick Actions.
Step 3: Tap on +Invoice.
Step 4: Enter the Invoice Date and Due Date.
Step 5: Tap the checkbox beside Set Customer Reminder to activate reminders.
Step 6: Under Customer Details, tap the contact icon to add customer details.
Step 7: Tap on the Add Items icon to add products or services.
Step 8: Select the product and tap Add to Invoice.
Step 9: Tap Proceed to Checkout.
Step 10: Under Payment Status, select Partly Paid.
Step 11: Choose the Payment Method: Cash, POS, or Bank Transfer.
Step 12: Enter the Amount Paid.
Step 13: (Optional) Enable Discounts, Shipping Fees, or add Terms and Conditions.
Step 14: Toggle the option beside Not Delivered/Settled if shipment has been confirmed.
Step 15: Tap Save Invoice to finish.
Troubleshooting
-
I can’t save the invoice
-
Ensure all required fields (Invoice Date, Customer, Items) are filled.
-
Check if you have internet access if cloud backup is enabled.
-
Customer details are not loading
-
Refresh the app and retry.
-
Confirm that the customer was properly saved in your contacts or customer list.
-
Reminders are not being sent
-
Verify that customer details include a valid email or phone number.
-
Ensure SMS/Email reminder settings are enabled in your app preferences.
FAQs
Q1: Can I edit an invoice after saving it?
Yes, you can open the invoice later to update details such as payment status.
Q2: Can I issue a refund on an invoice?
Yes, refunds can be managed by editing the invoice and recording a negative adjustment.
Q3: Can I export invoices?
Yes, invoices can be exported as PDF or Image files from the app.