How to Add Inflow and Expenses on Mobile
The Inflow/Expense page in Timart Business allows you to record, view, and manage all income (inflow) and spending (expenses) in one place. You can also view detailed reports and filter records by date, category, user, or transaction.
How to Add Income
-
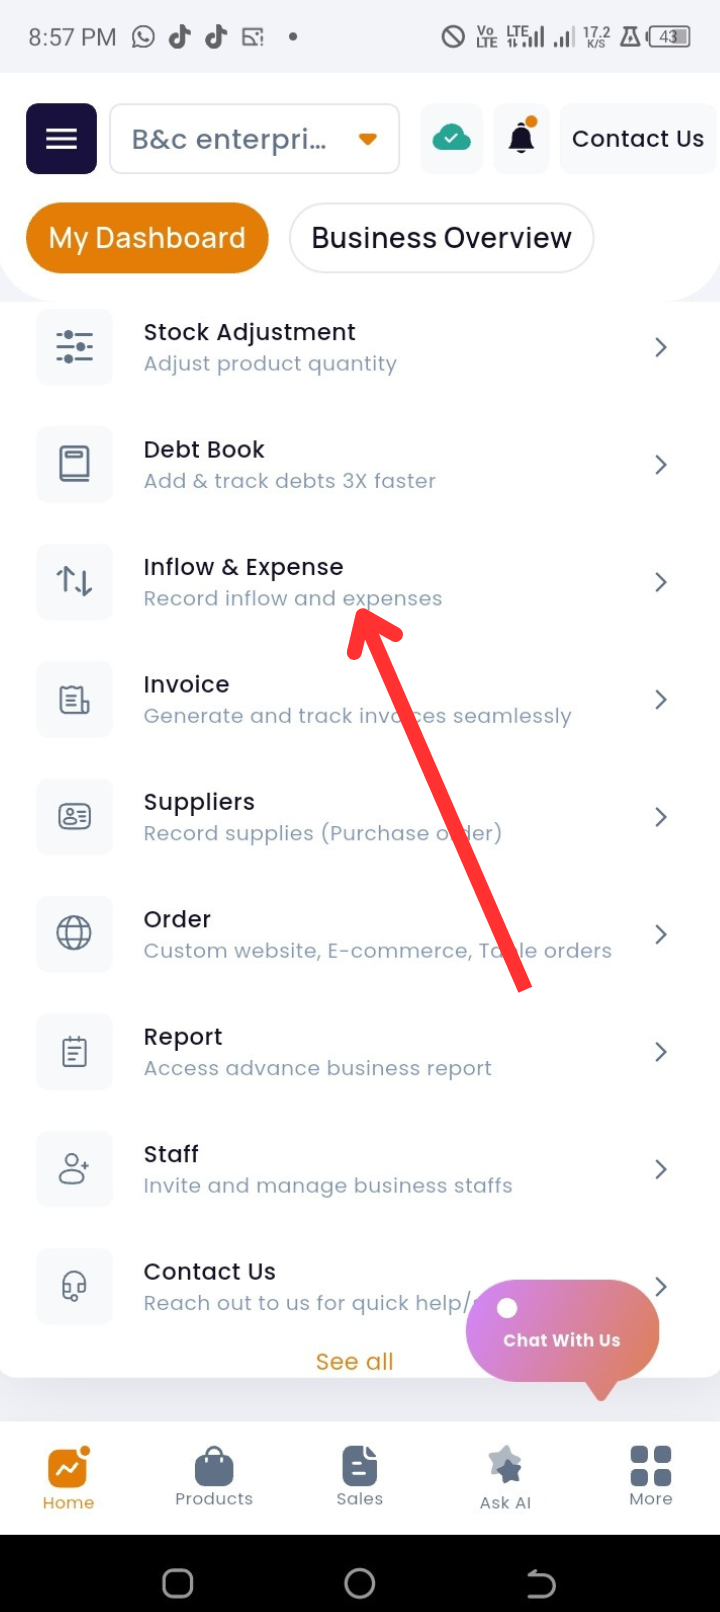
Open the Timart Business app and go to the Home page.
-
Tap Inflow/Expense under Quick Actions.
-
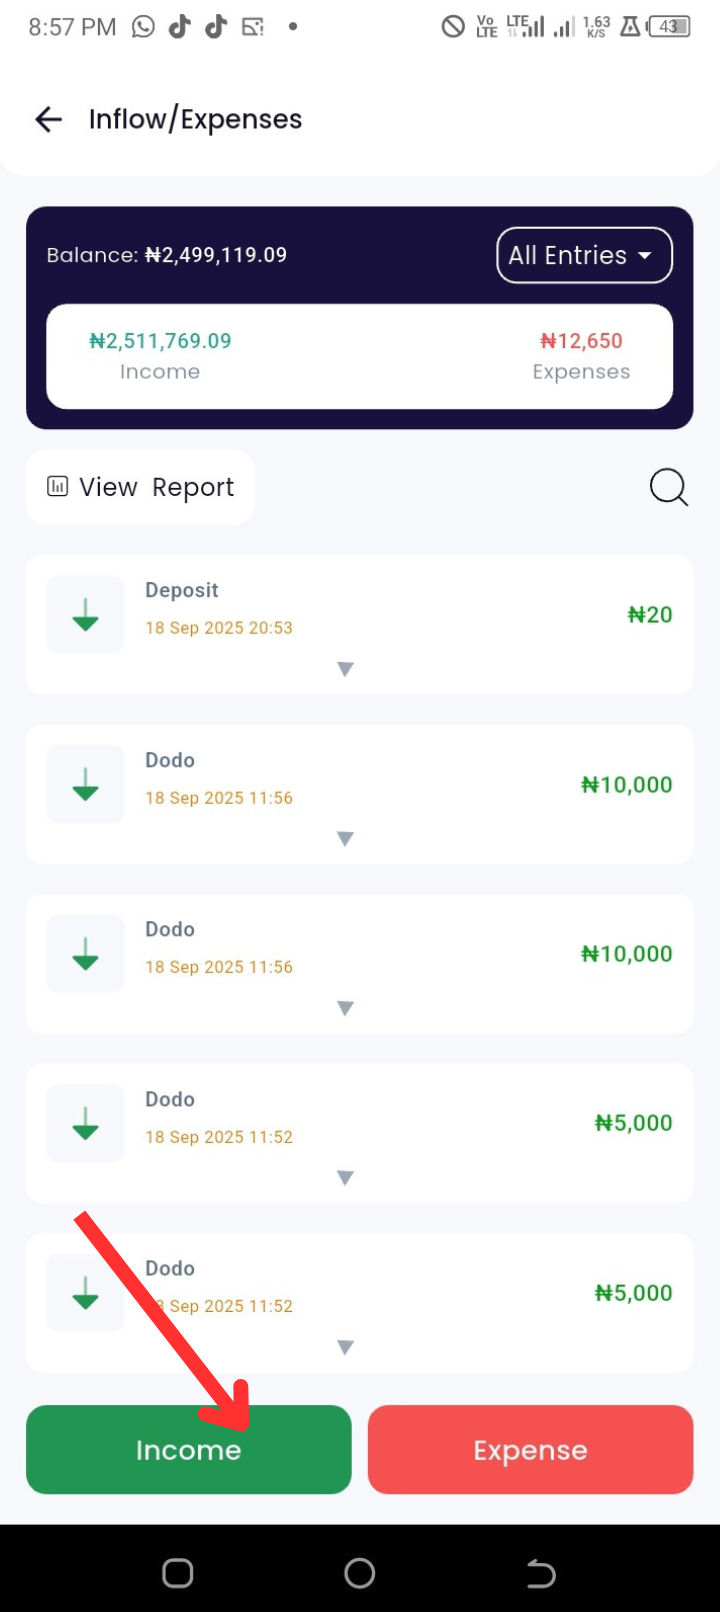
Tap Income.
-
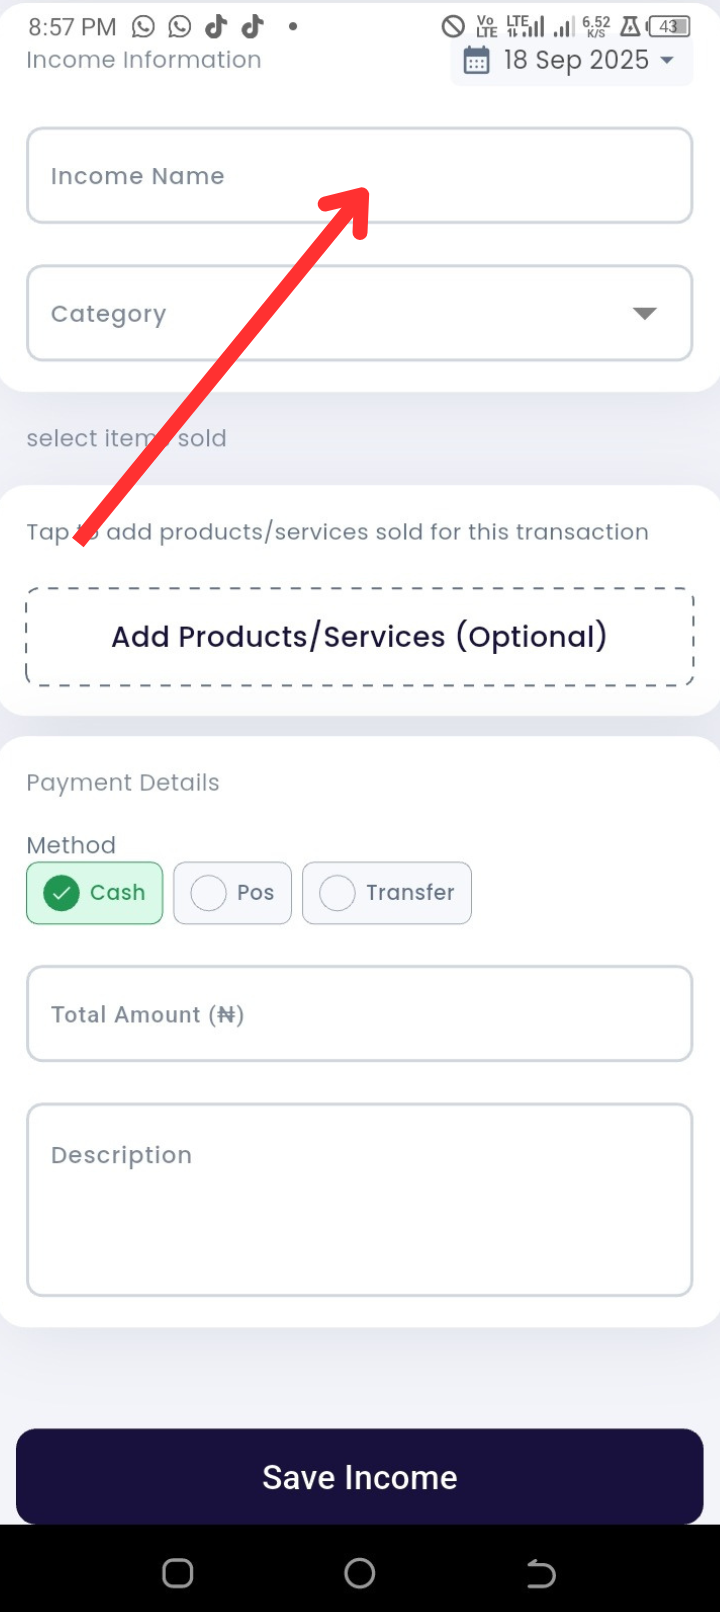
Enter the Income Name.
-
Tap Category to select or create a category:
-
Choose from existing categories, or
-
Tap to create a new category and name it.
-
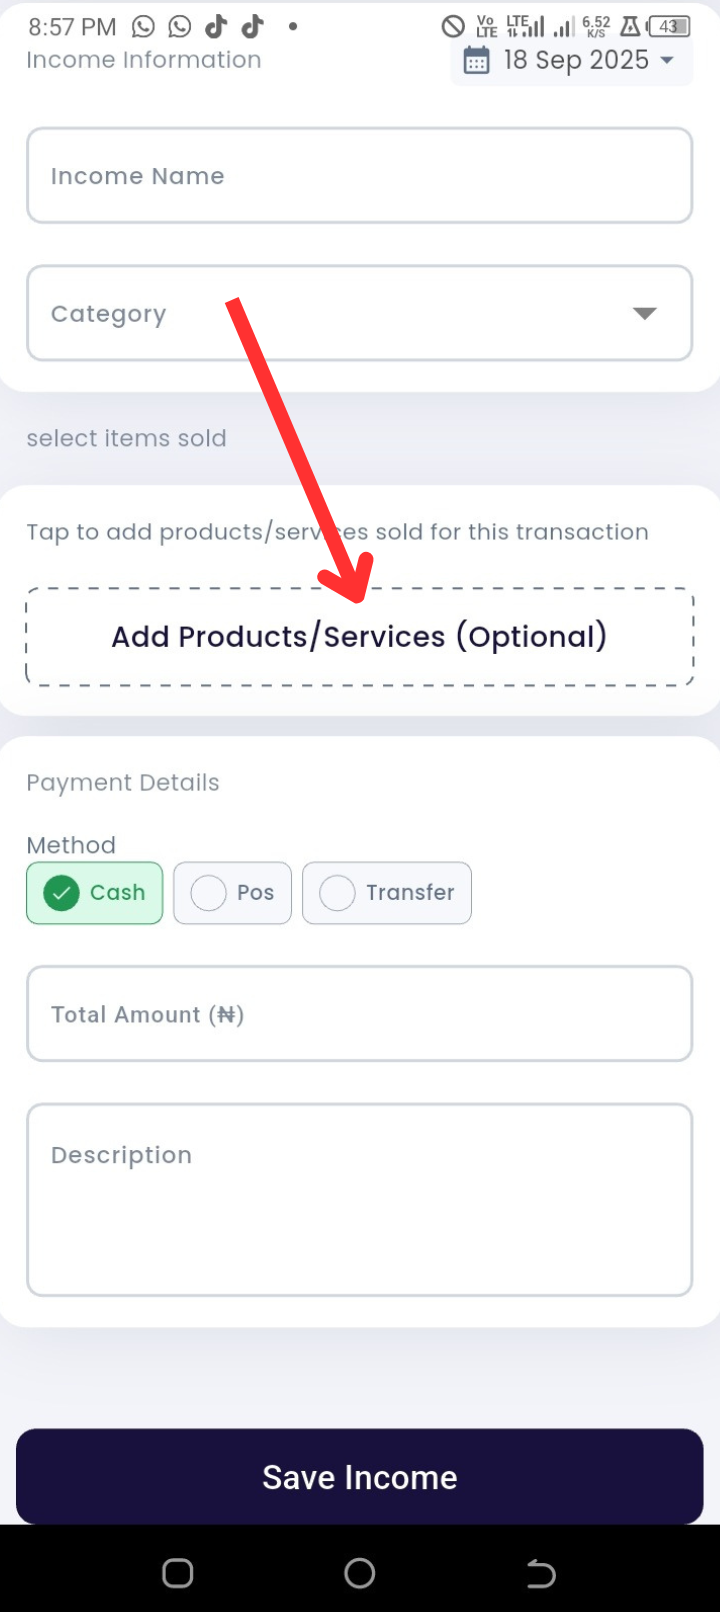
(Optional) If the income is linked to a transaction, tap Add Products/Services:
-
Select from existing products by tapping Tap Here to Add from Existing Products, or
-
Enter product/service details manually (name, category, quantity, selling price, purchase price).
-
Select whether to Add to Inventory List.
-
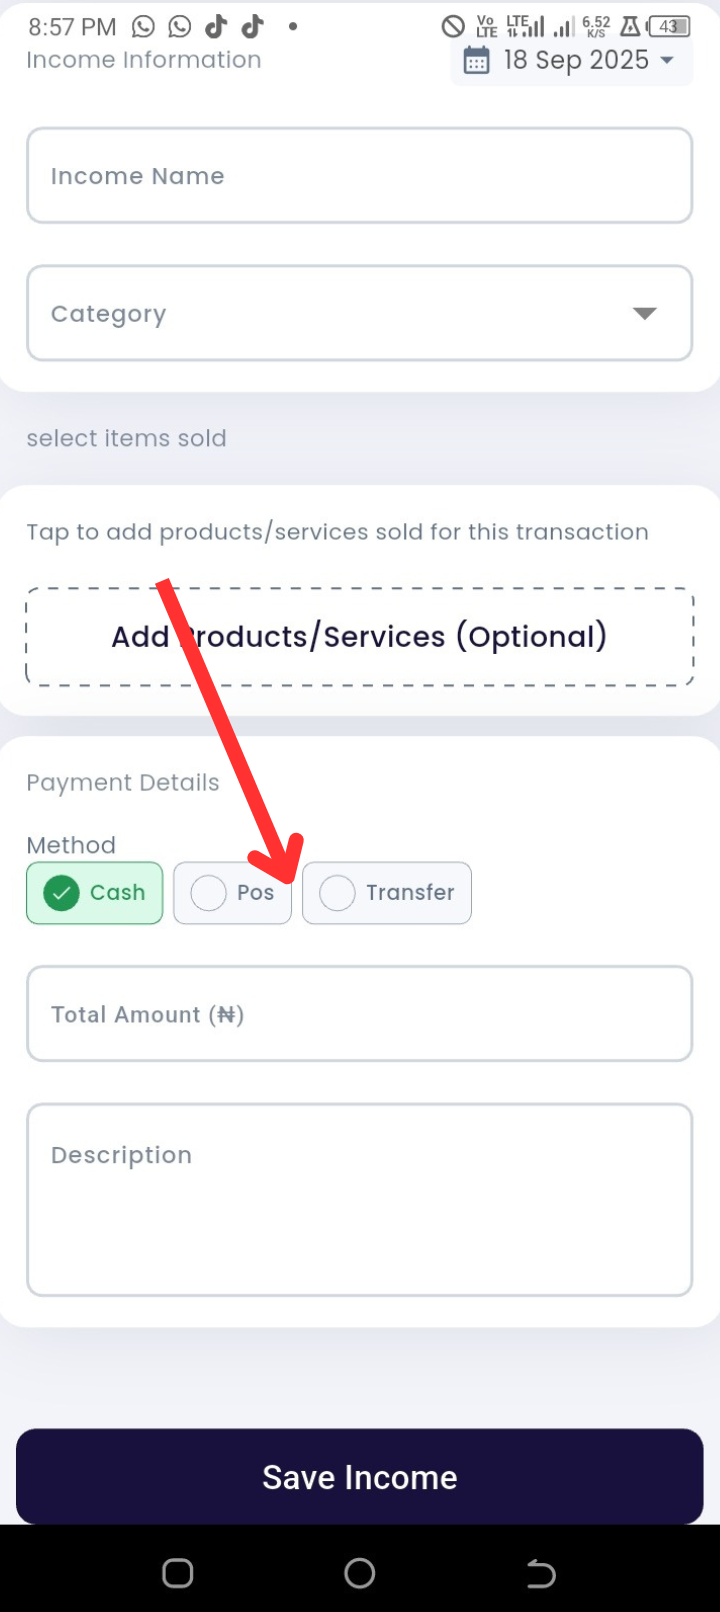
Select a Payment Method (Cash, POS, or Transfer).
-
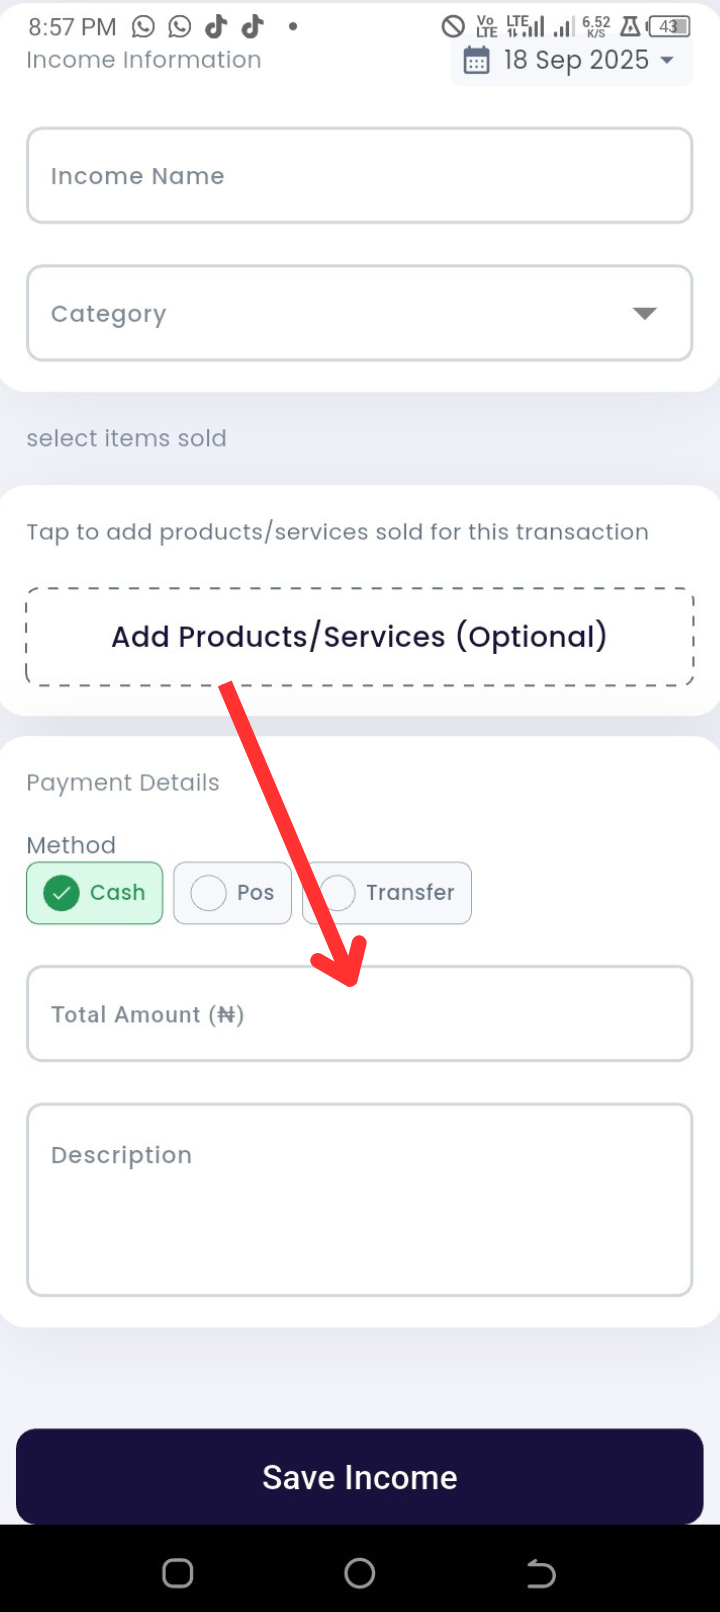
Enter the Income Amount.
-
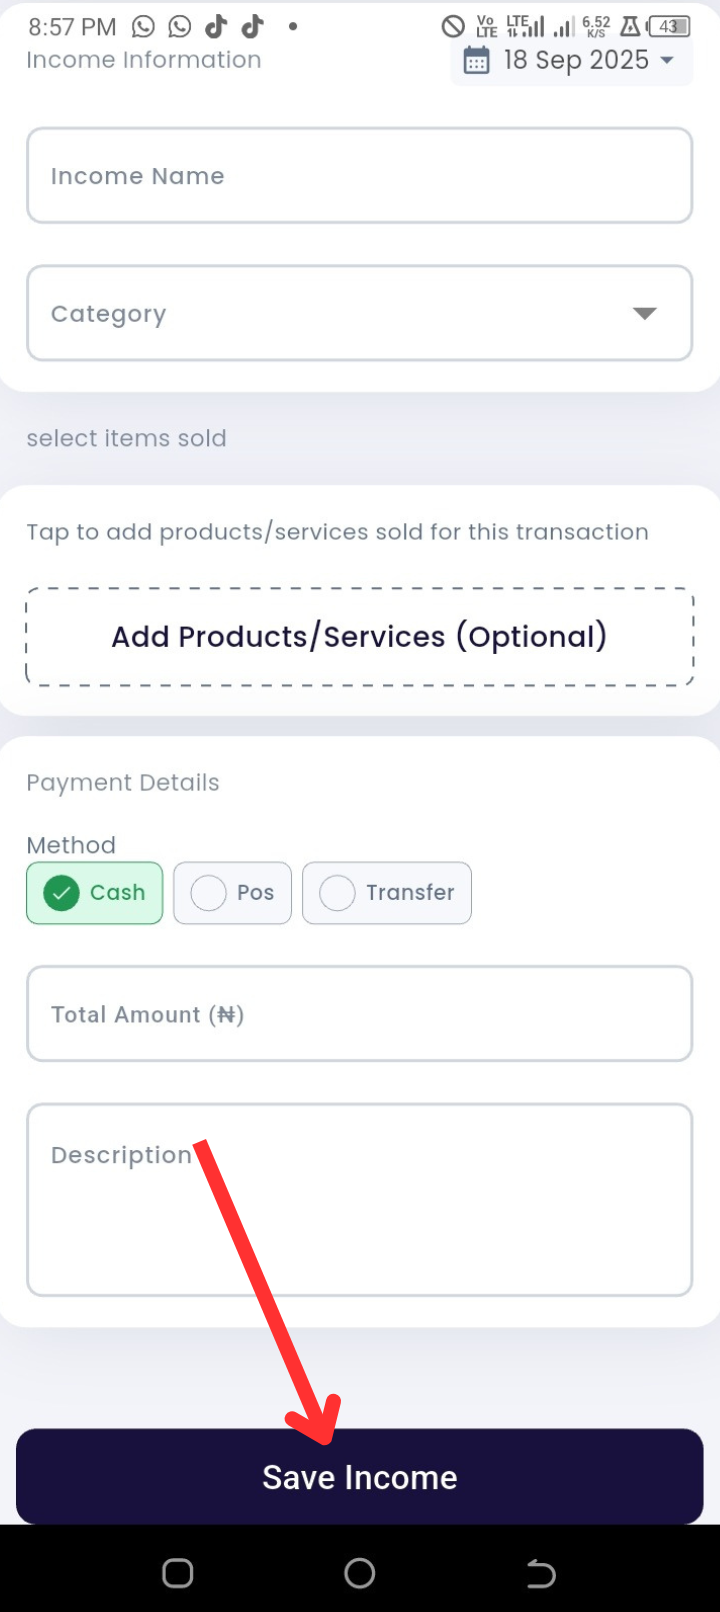
Tap Save Income to finish.
How to Add Expenses
-
Open the Timart Business app and go to the Home page.
-
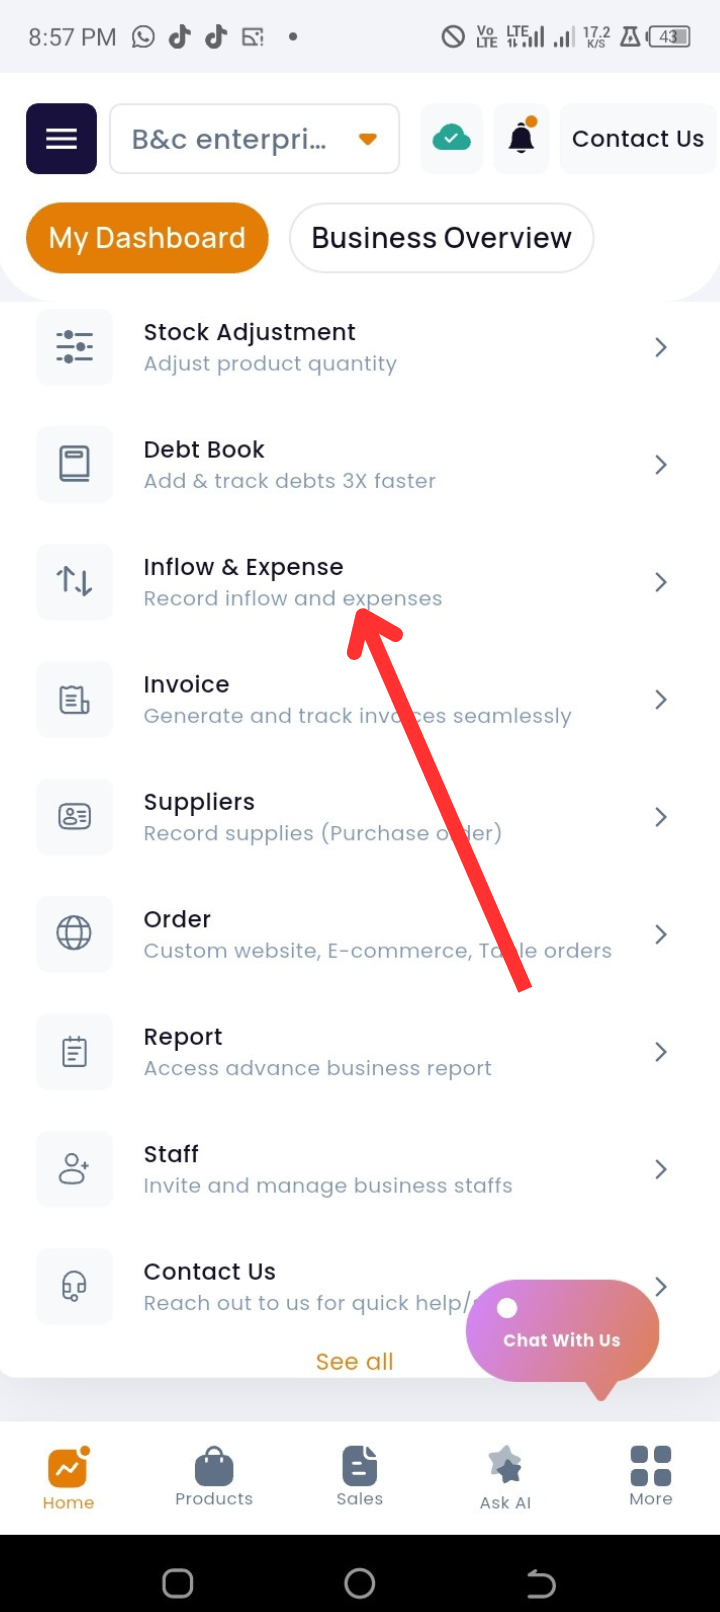
Tap Inflow/Expense under Quick Actions.
-
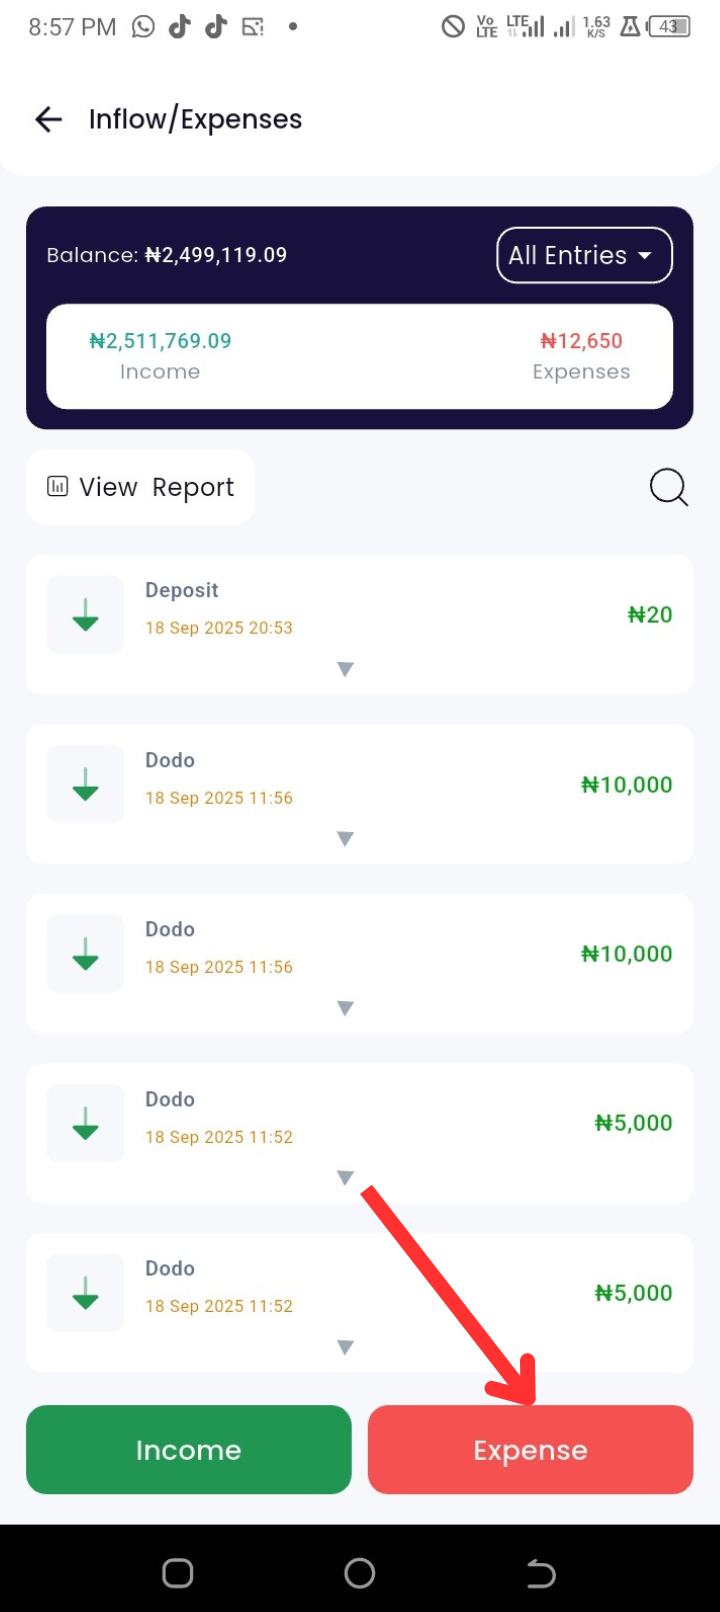
Tap Expense.
-
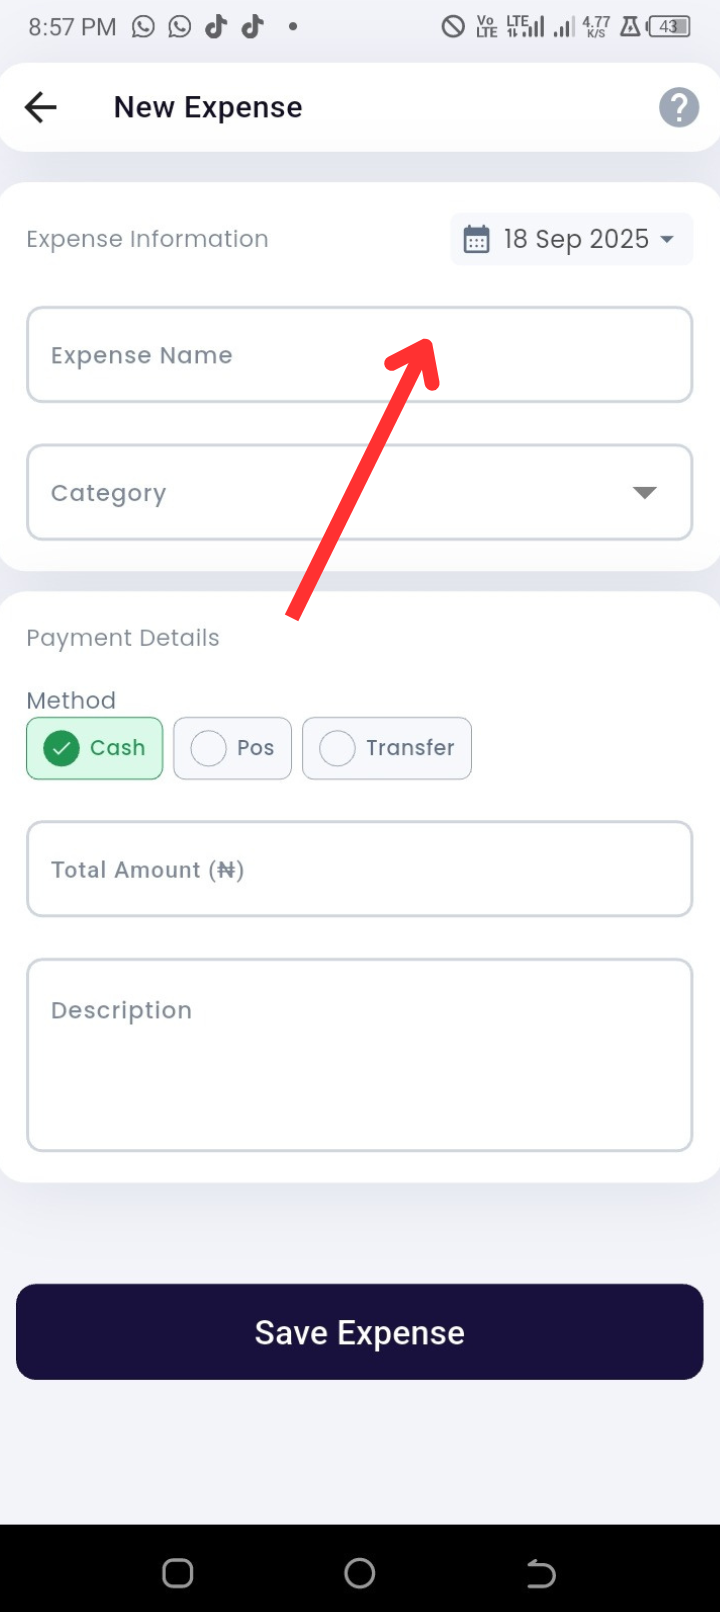
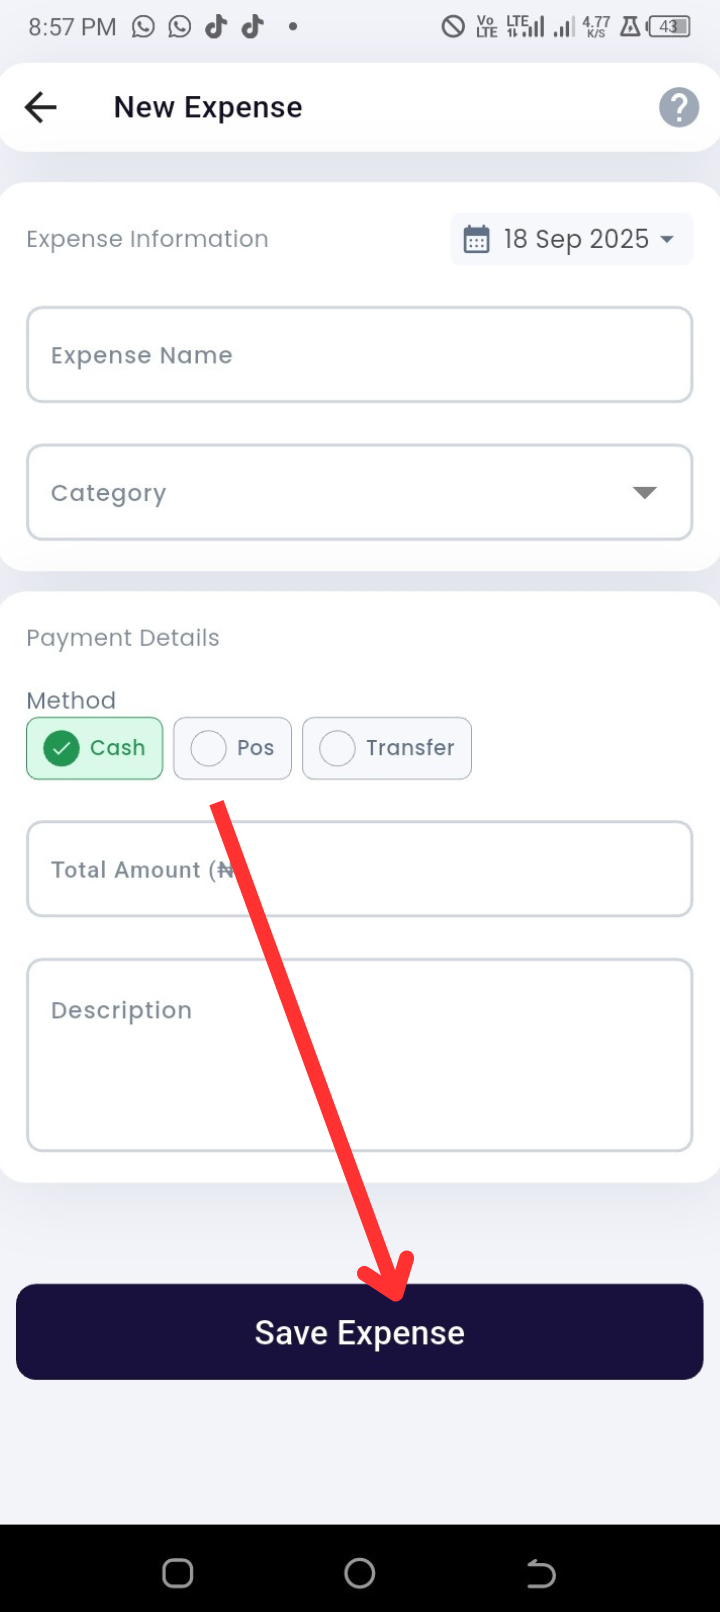
Enter the Expense Name.
-
Tap Category to select or create a category:
-
Choose from existing categories, or
-
Tap to create a new category.
-
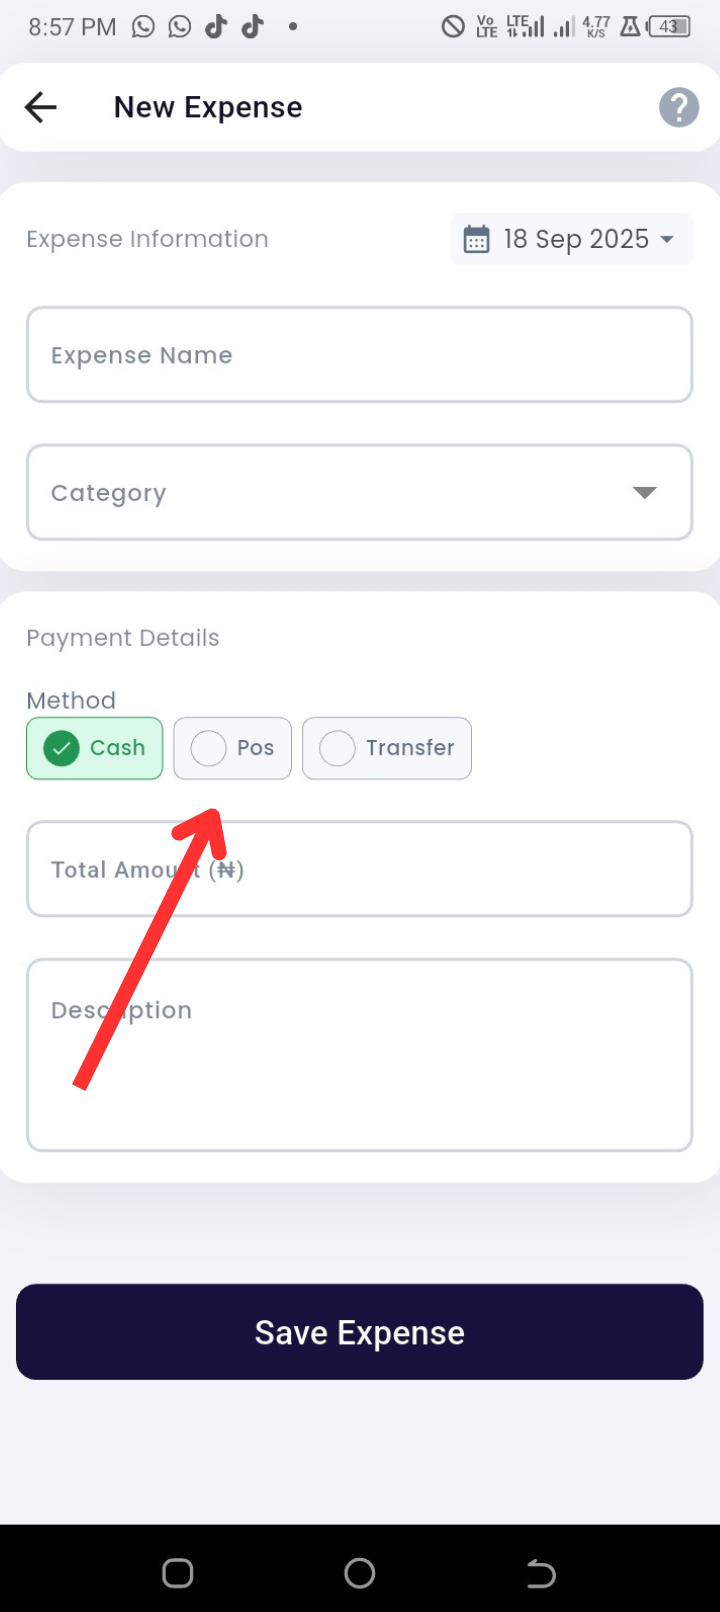
Select a Payment Method (Cash, POS, or Transfer).
-
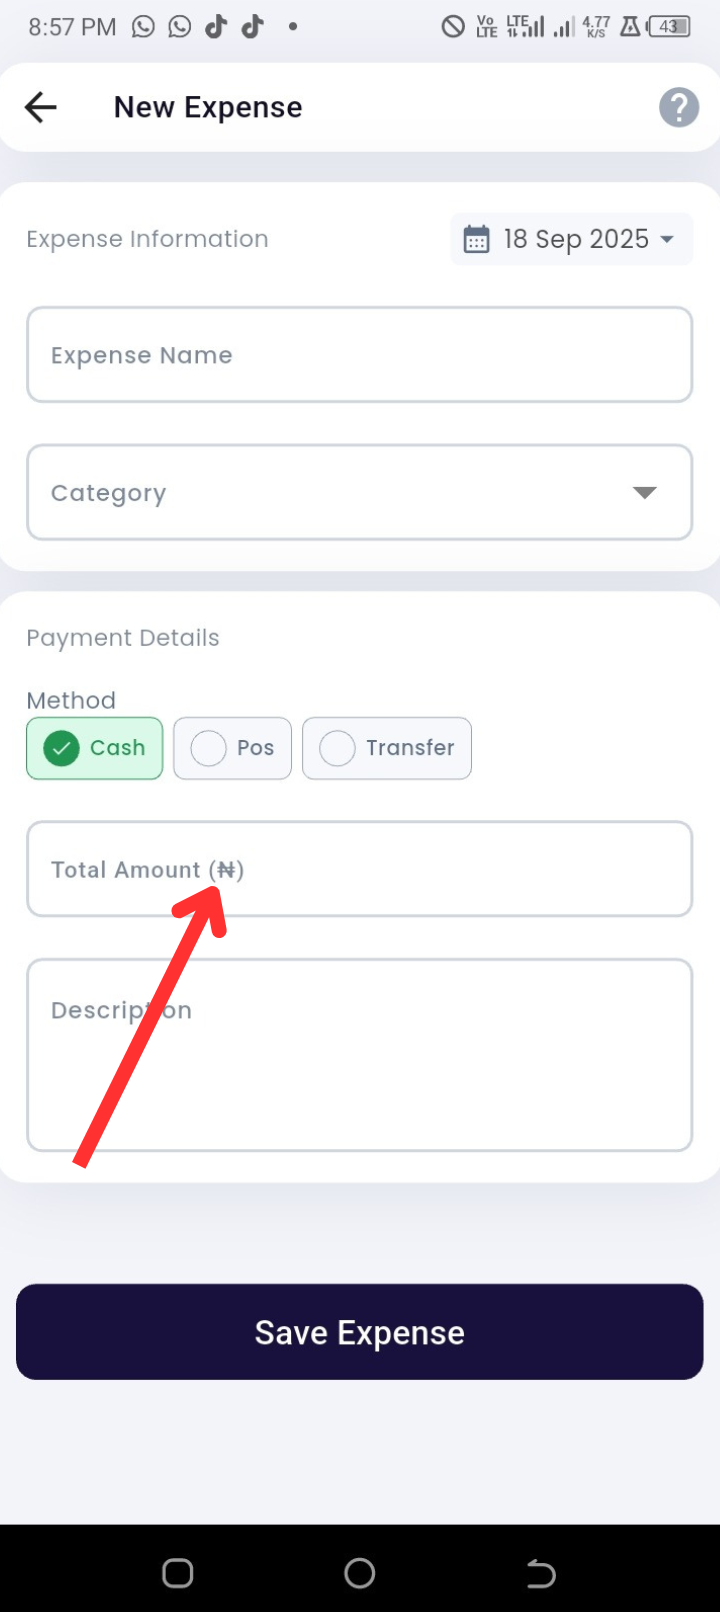
Enter the Expense Amount.
-
(Optional) Add a Description for more context.
-
Tap Save Expense to finish.
Troubleshooting
|
Issue |
Possible Cause |
Suggested Fix |
|
Cannot find category |
No category created yet |
Tap Category and create a new one before saving |
|
Wrong amount saved |
Typo during entry |
Edit the record by opening it in the Inflow/Expense list |
|
Product not showing in list |
Product not added to inventory |
Check product inventory settings; ensure “Add to Inventory List” was selected |
|
Entry not saving |
Poor internet connection or outdated app |
Reconnect to the internet; update the app and retry |
|
Income recorded as expense (or vice versa) |
Wrong section tapped |
Always confirm you are in the Income or Expense section before entry |
Frequently Asked Questions (FAQs)
Q: Can I edit an inflow or expense after saving?
Yes. Open the Inflow/Expense list, tap the record you want to change, and update the details.
Q: Can I record inflow or expenses offline?
Yes. They will sync automatically when the device reconnects to the internet.
Q: What’s the benefit of linking a product/service to income?
It helps track sales-related income more accurately and updates inventory automatically.
Q: Can I filter inflow and expenses?
Yes. Use the Filter options on the Inflow/Expense page to sort by date, category, user, or transaction type.
Q: How can I delete an inflow or expense?
Go to the Inflow/Expense list, select the record, and tap Delete Expense.