How to Activate Expiry Date on a Product (Mobile)
The Expiry Date feature in the Timart Business App helps you keep track of products with limited shelf life, perfect for businesses dealing with perishable goods, cosmetics, or pharmaceuticals.
📲 Step-by-Step Guide
1. Launch the App
Open the Timart Business App and go to your Dashboard.
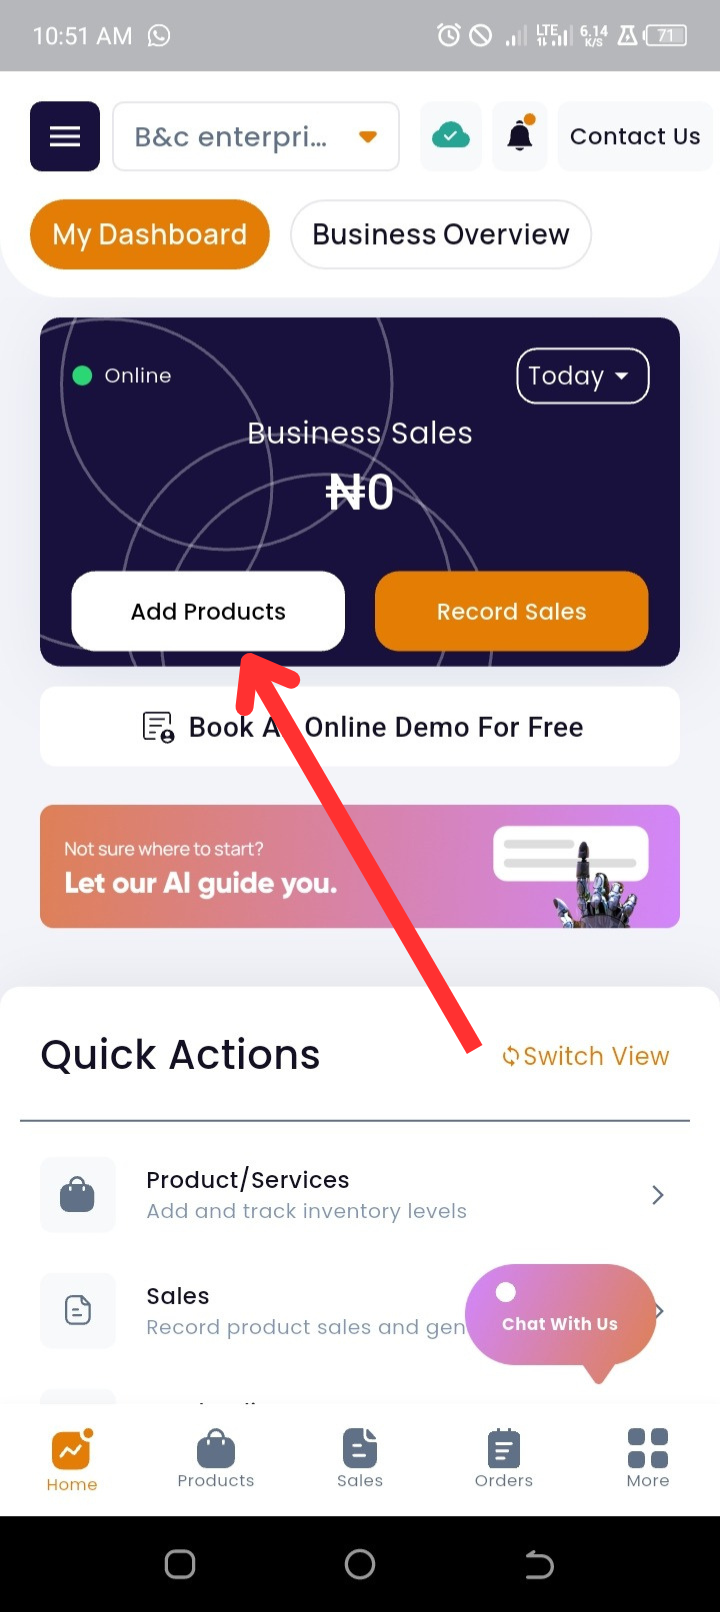
2. Tap “Add Products”
Select Add Products at the top of the page.
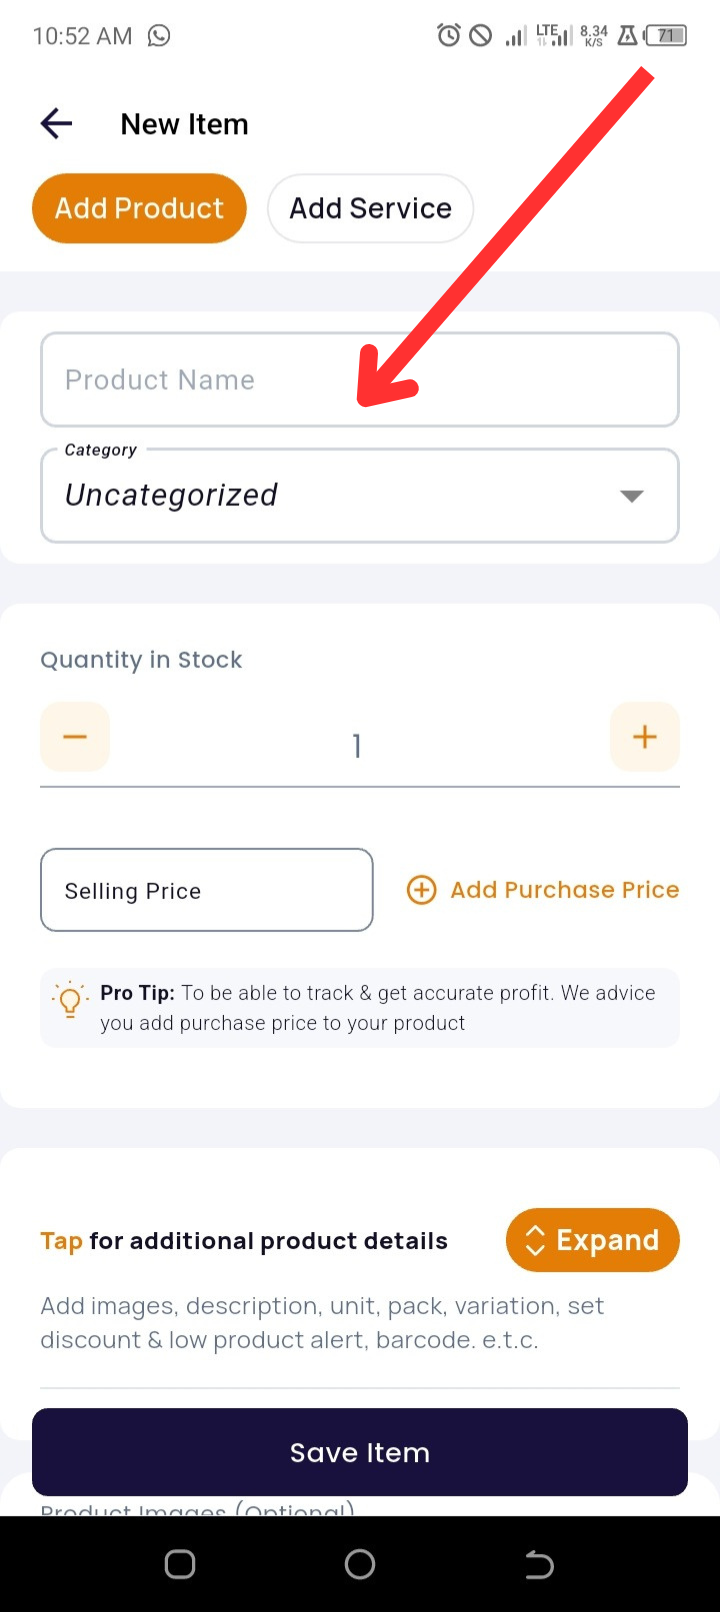
3. Enter Product Details
-
Input the Product Name
-
Select or create a Category (optional)
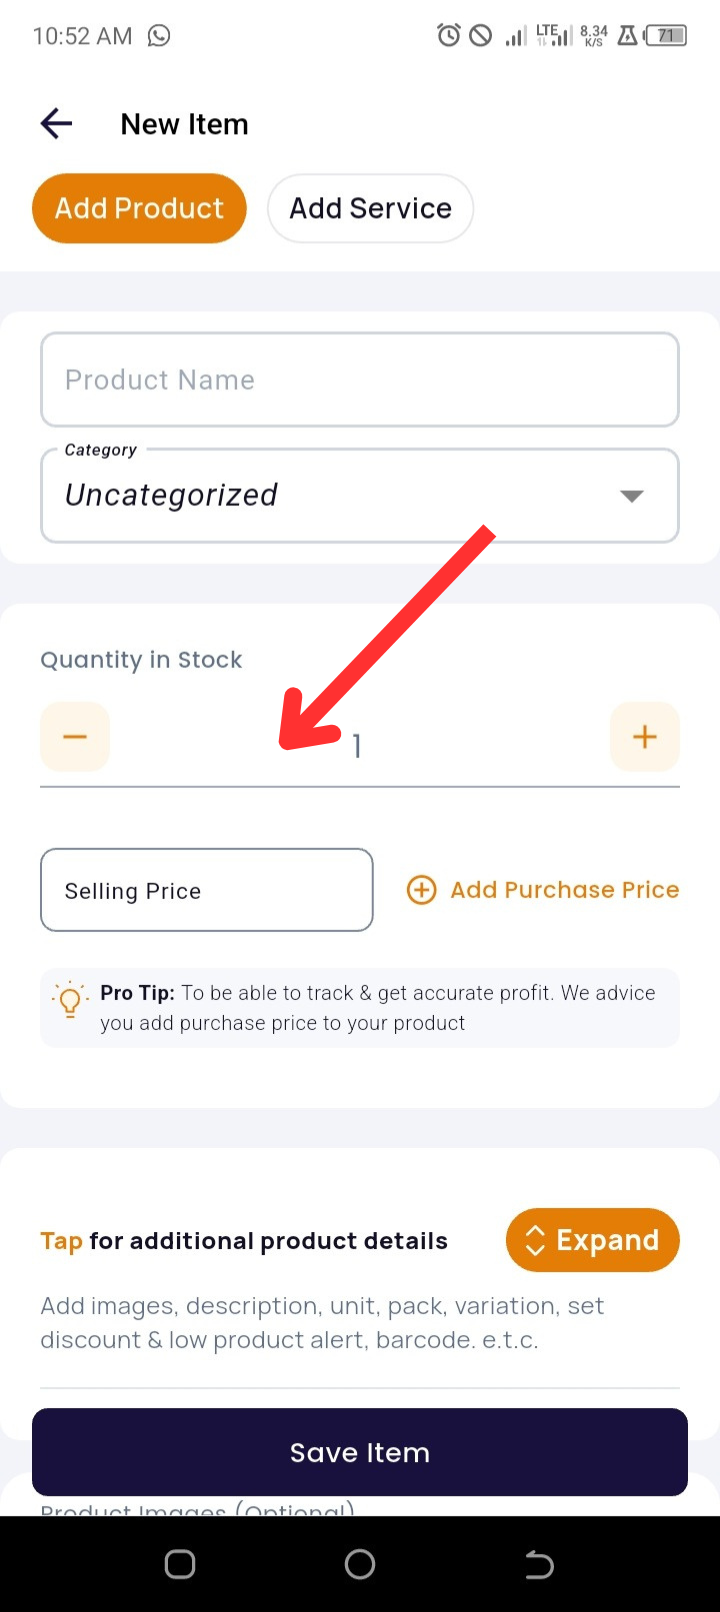
4. Add Inventory and Pricing Information
-
Enter the Product Quantity
-
Input the Selling Price
-
Tap + Add Purchase Price (optional but recommended for profit calculations)
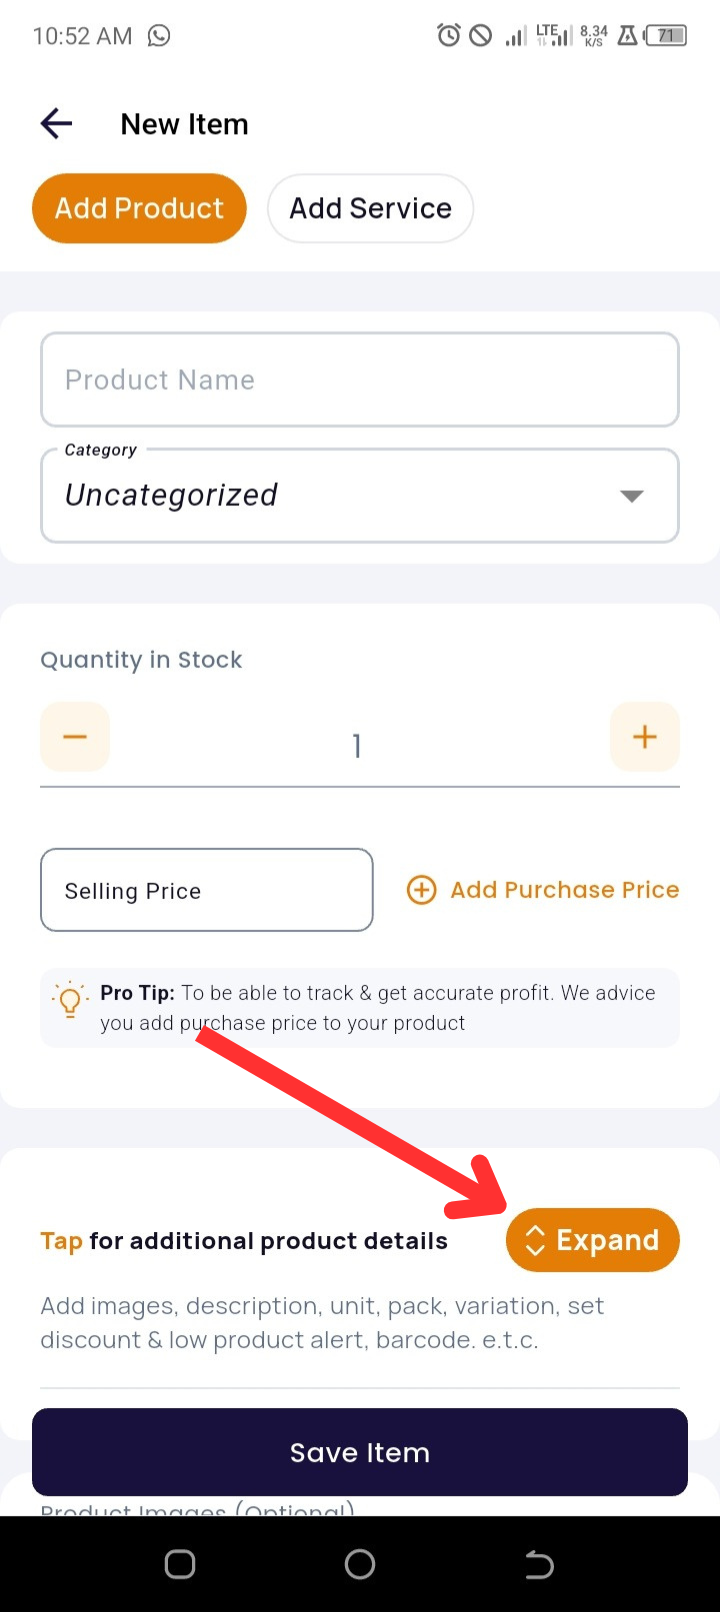
5. Activate Expiry Date
-
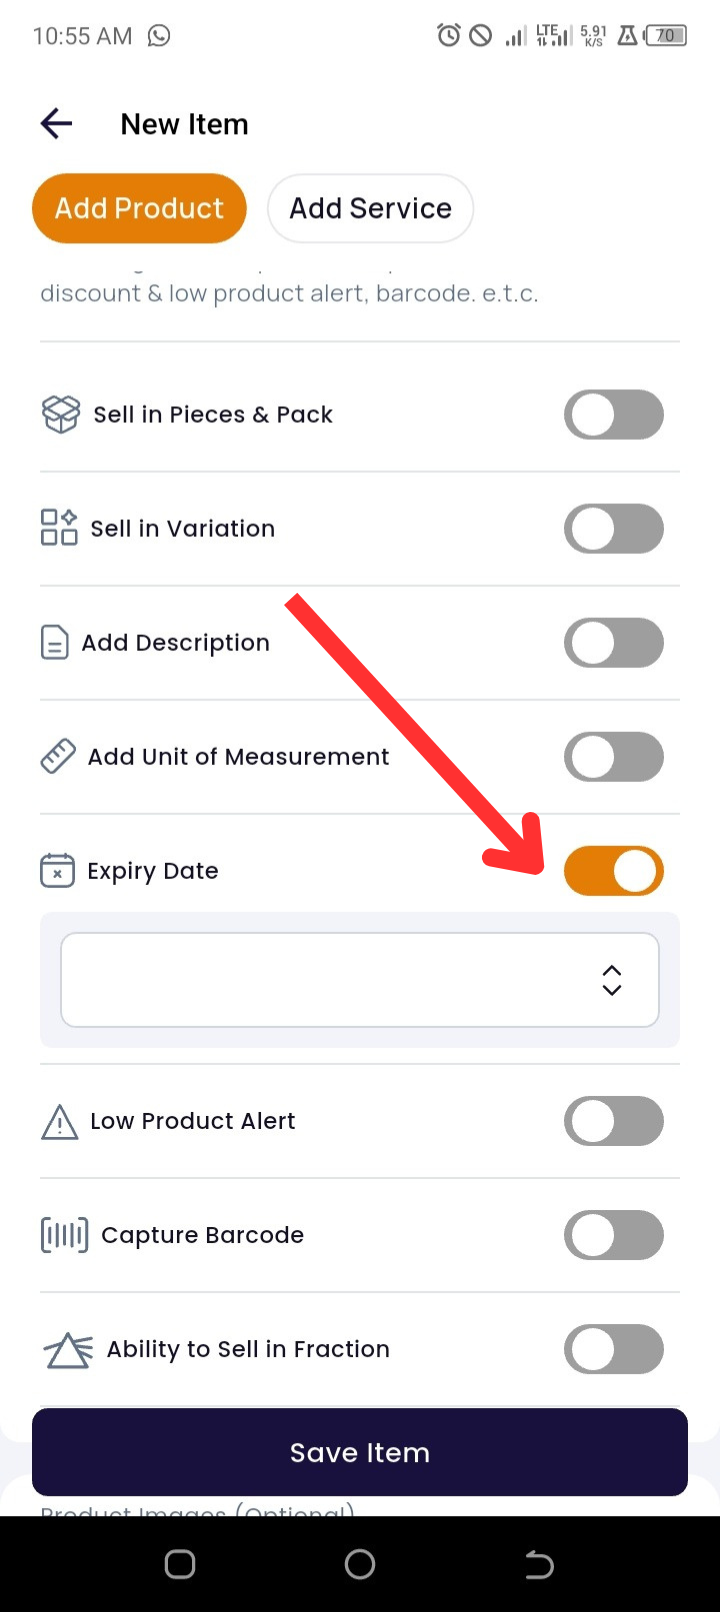
Tap Expand to open advanced product options
-
Scroll to Expiry Date and tap the toggle to enable it
-
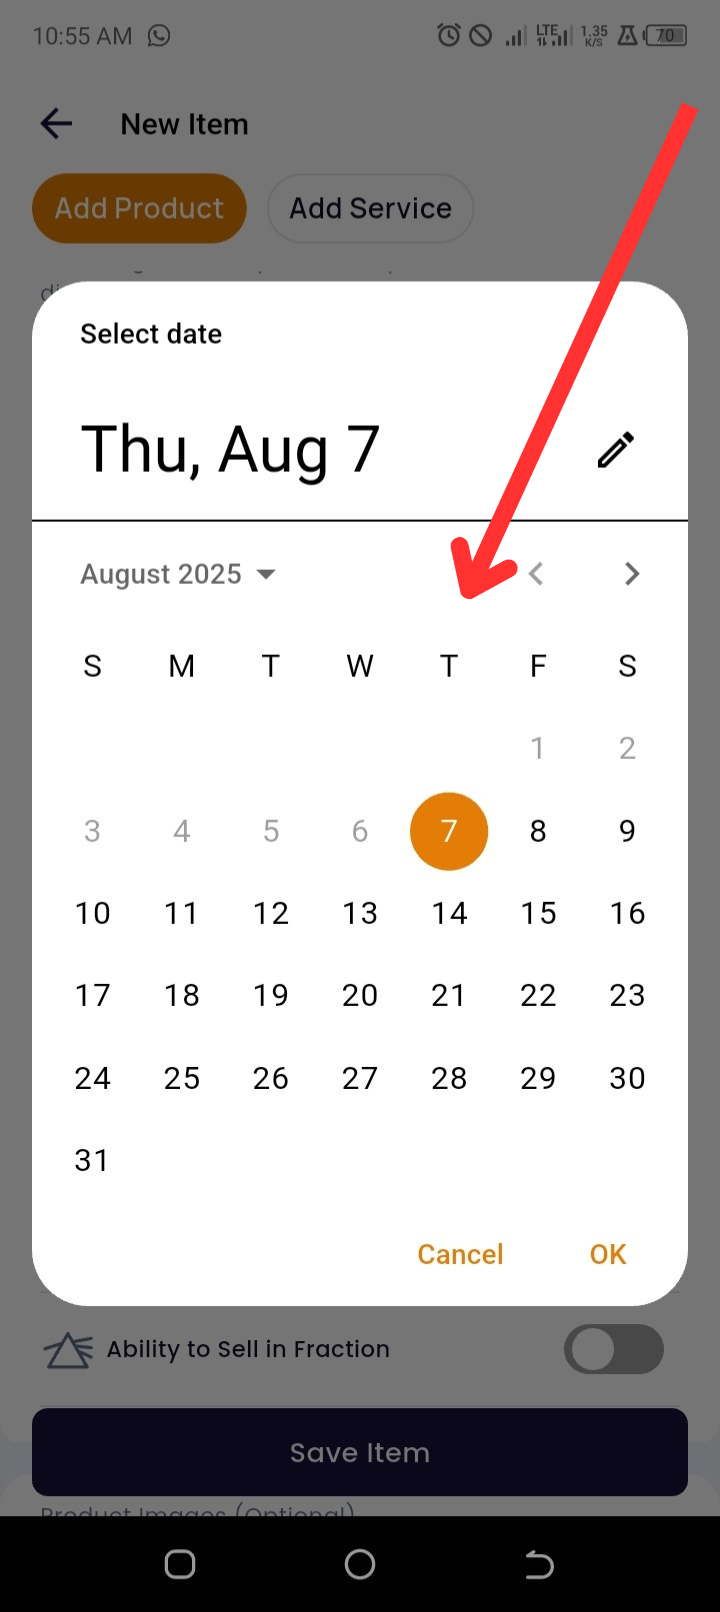
Set the product’s expiry date using the calendar picker
6. Add Product Images (Optional)
-
Tap Add Images to upload product photos
7. Save Your Entry
-
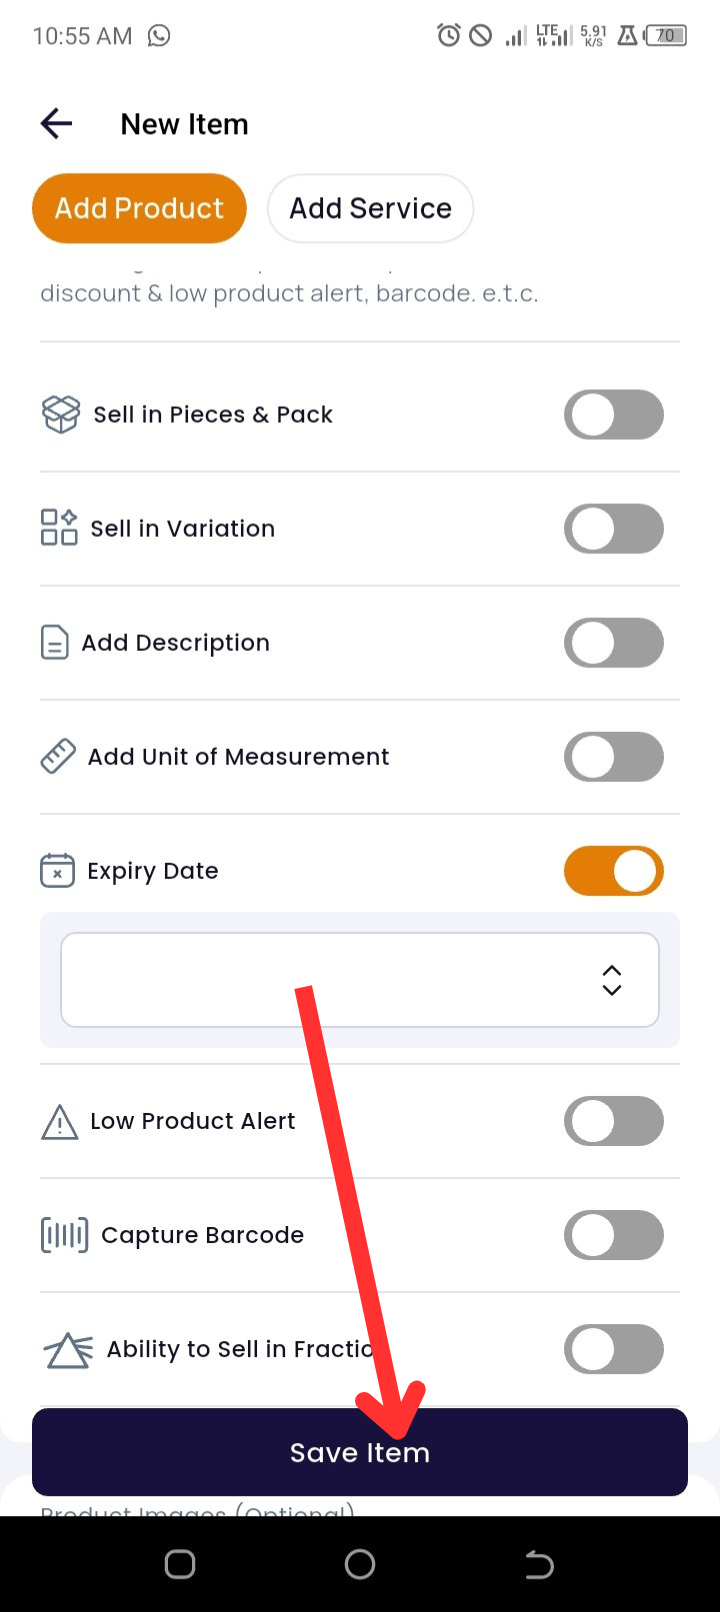
Tap Save Item to complete the process
✅ Pro Tips
-
Use expiry dates for perishable or date-sensitive products like groceries, drugs, beverages, or cosmetics.
-
Enable Low Product Alerts alongside expiry dates to ensure proactive stock replacement.
🛠️ Troubleshooting
|
Issue |
Possible Cause |
Solution |
|
Can’t find Expiry Date toggle |
App version may be outdated |
Update to the latest version via Play Store or App Store |
|
Calendar picker not responding |
Device may be lagging or frozen |
Close and reopen the app, or restart your device |
|
Expiry date not saving |
Required fields not completed |
Ensure Product Name, Quantity, and Selling Price are filled in before saving |
❓ Frequently Asked Questions (FAQs)
Q1: Can I edit the expiry date after saving the product?
✅ Yes. Go to the Products page, tap the product, select Edit, and update the expiry date.
Q2: Is expiry date required for every product?
🛑 No. It's optional, but strongly recommended for time-sensitive inventory.