How to Add Products in the Timart Business App on Mobile
Adding products to your inventory in the Timart Business App is fast, intuitive, and flexible., you can add new items using two simple methods:
-
Quick Actions on your Dashboard
-
The Products Page from the Navigation Bar
Let’s walk you through both options with easy-to-follow steps.
✅ Method 1: Add Products via Quick Actions
This method is perfect when you want to add items directly from the main dashboard.
Step-by-Step Instructions
-
Open the Timart Business App and land on your Dashboard.
-
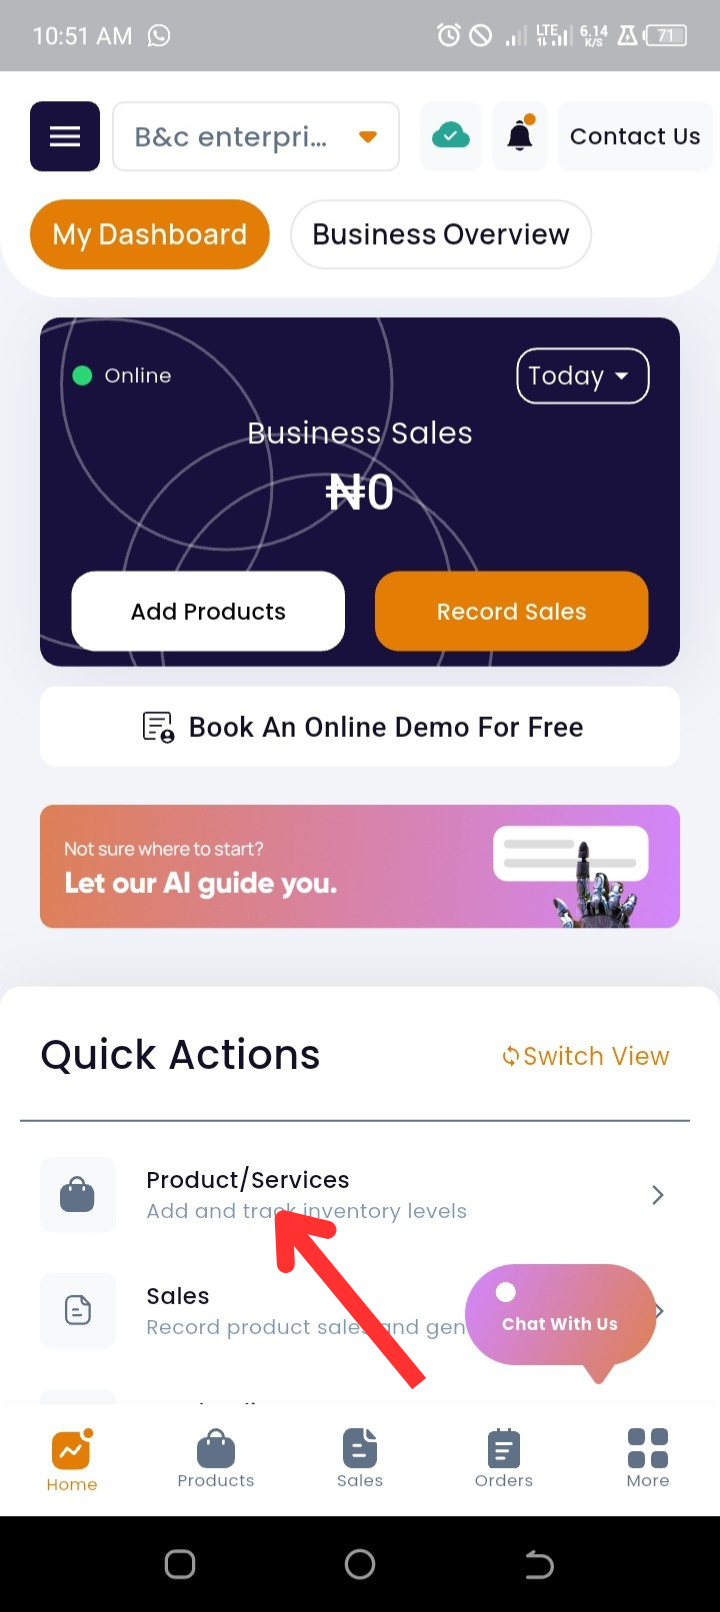
Tap Add Products under the Quick Actions section.
-
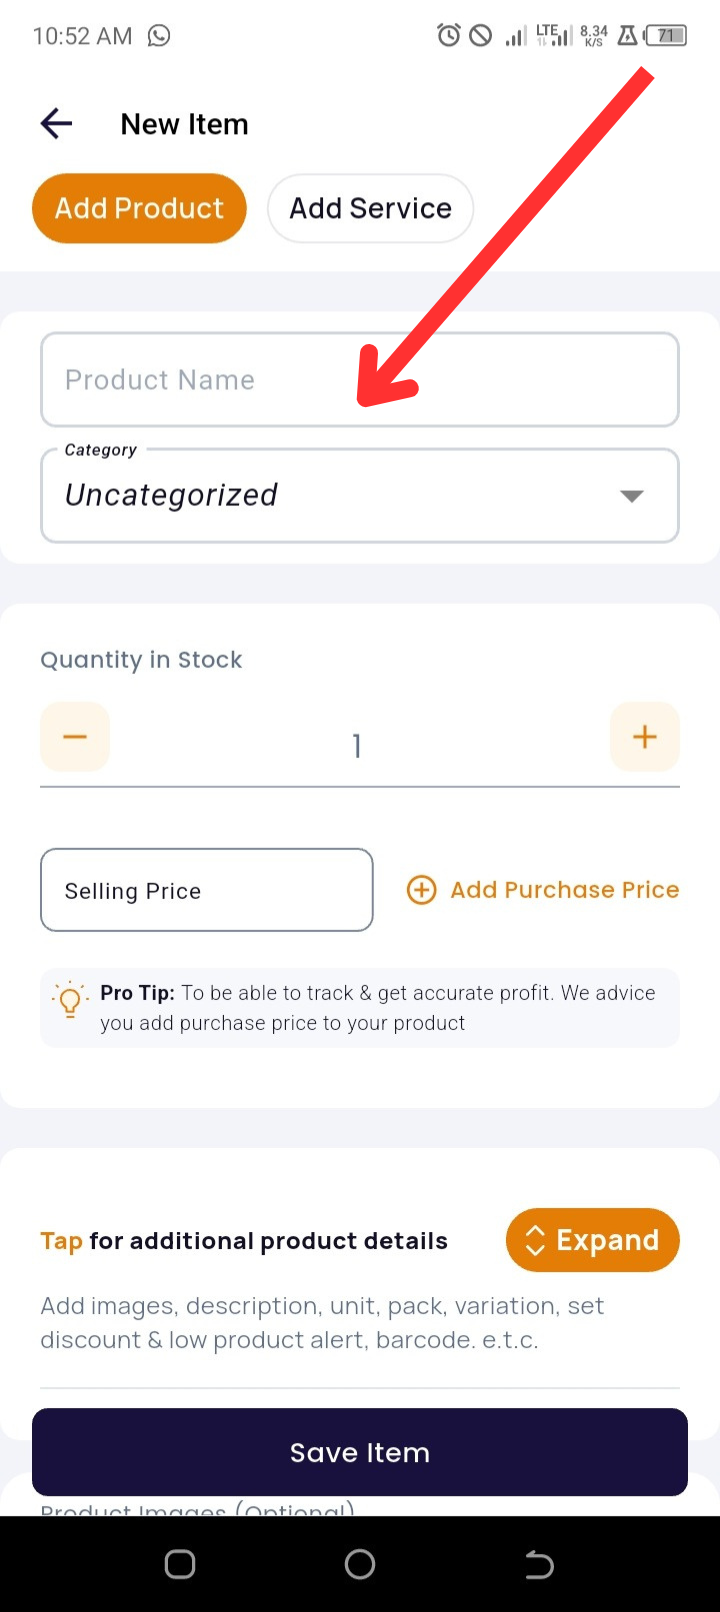
Enter the Product Name.
-
You can choose an existing category or create a new one (optional).
-
-
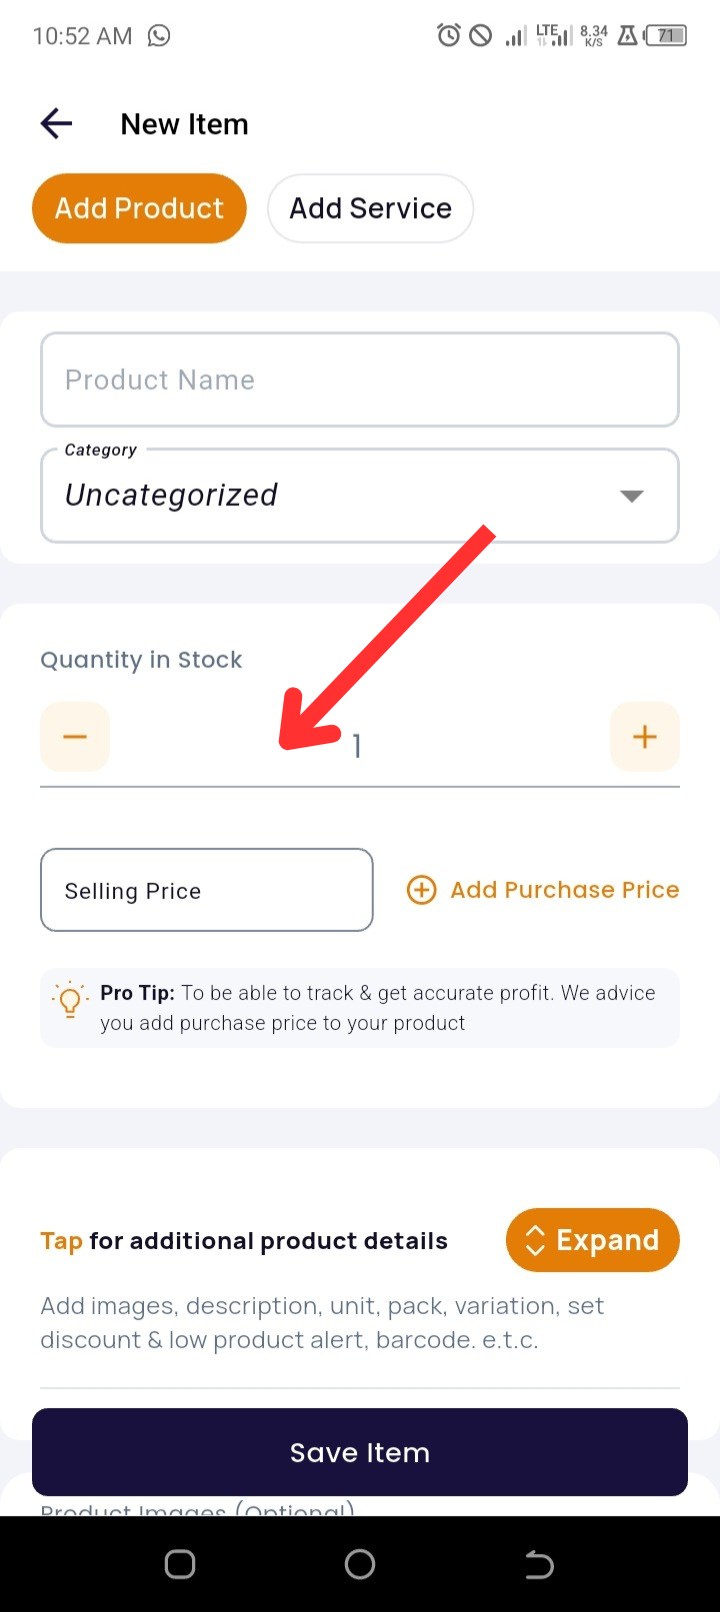
Fill in the following details:
-
Quantity
-
Selling Price
-
Tap + Add Purchase Price (this is optional but highly recommended to help track profit margins).
-
-
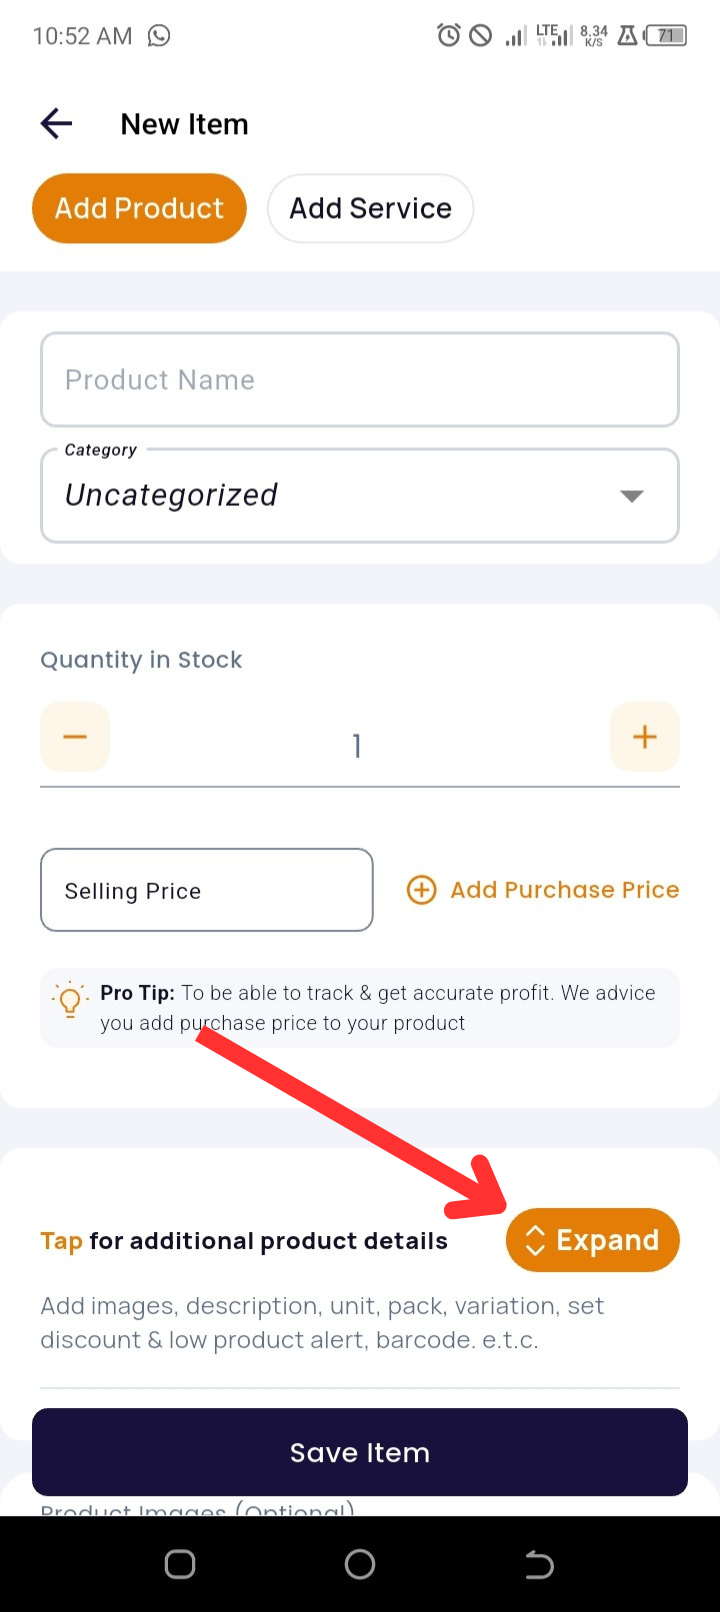
Tap Expand to include Additional Product Details such as:
-
Sell in Pieces or Packs
-
Sell in Variations (sizes, colors, etc.)
-
Description
-
Unit of Measurement (kg, litre, etc.)
-
Expiry Date (for perishable items)
-
Low Stock Alert
-
Barcode
-
Option to Sell in Fractions (e.g., half litre, quarter dozen)
-
-
(Optional) Tap Add Images to upload product photos.
-
Tap Save Item to finish.
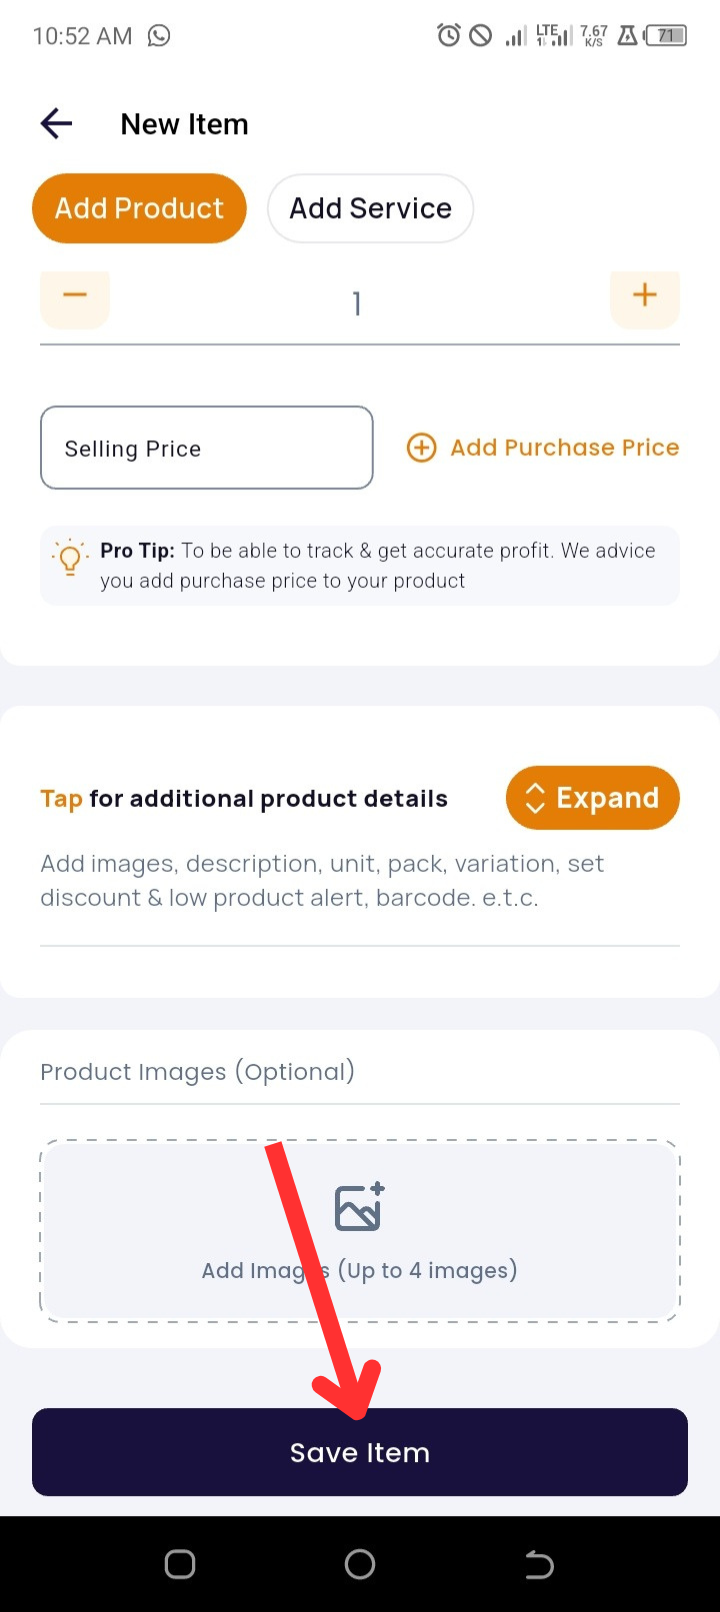
📝 Pro Tip: Including more product details helps improve inventory accuracy and customer clarity.
✅ Method 2: Add Products via the Products Page.
Step-by-Step Instructions
-
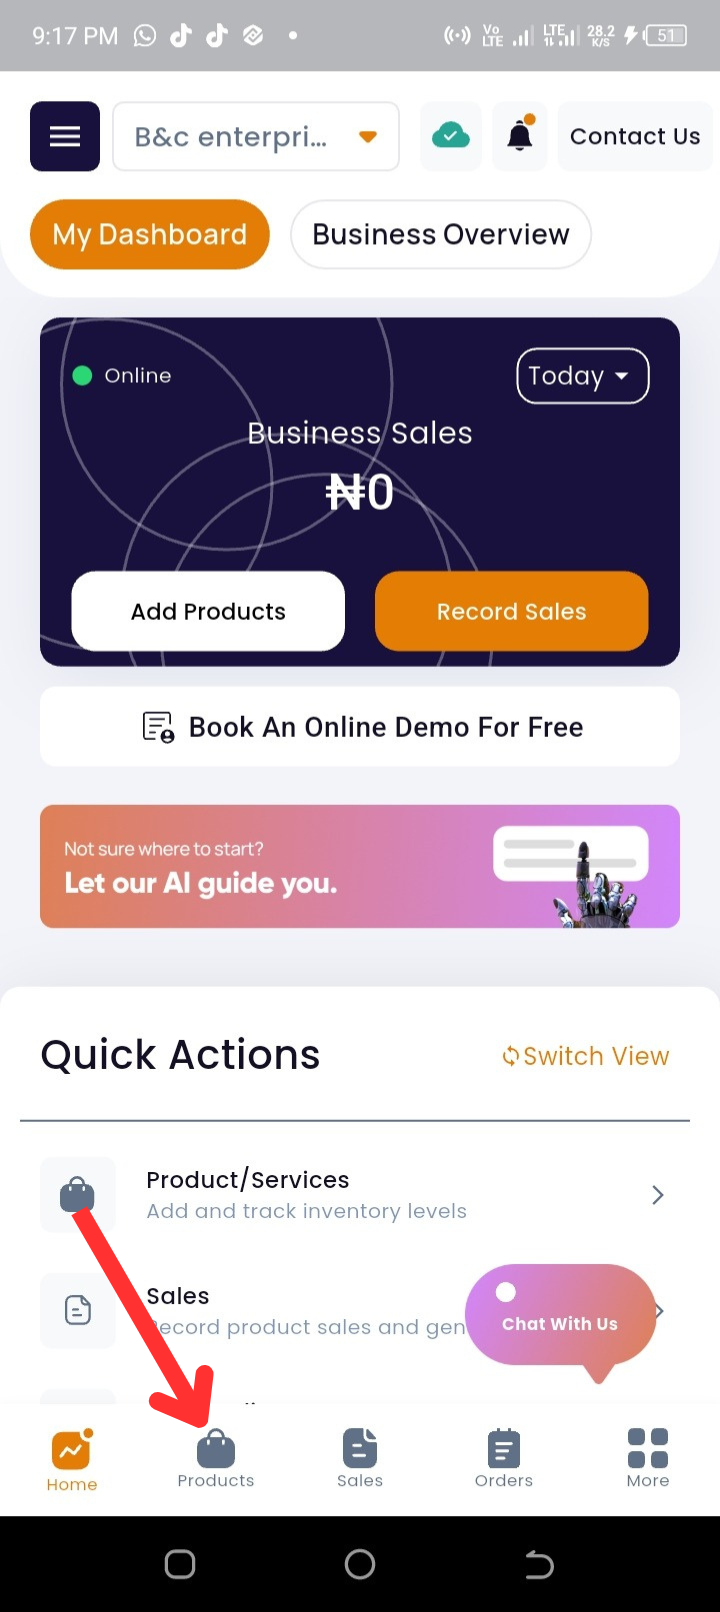
Launch the Timart Business App and go to the Dashboard.
-
Tap Products from the bottom navigation bar.
-
Tap + New Product and then select Add New Item.
-
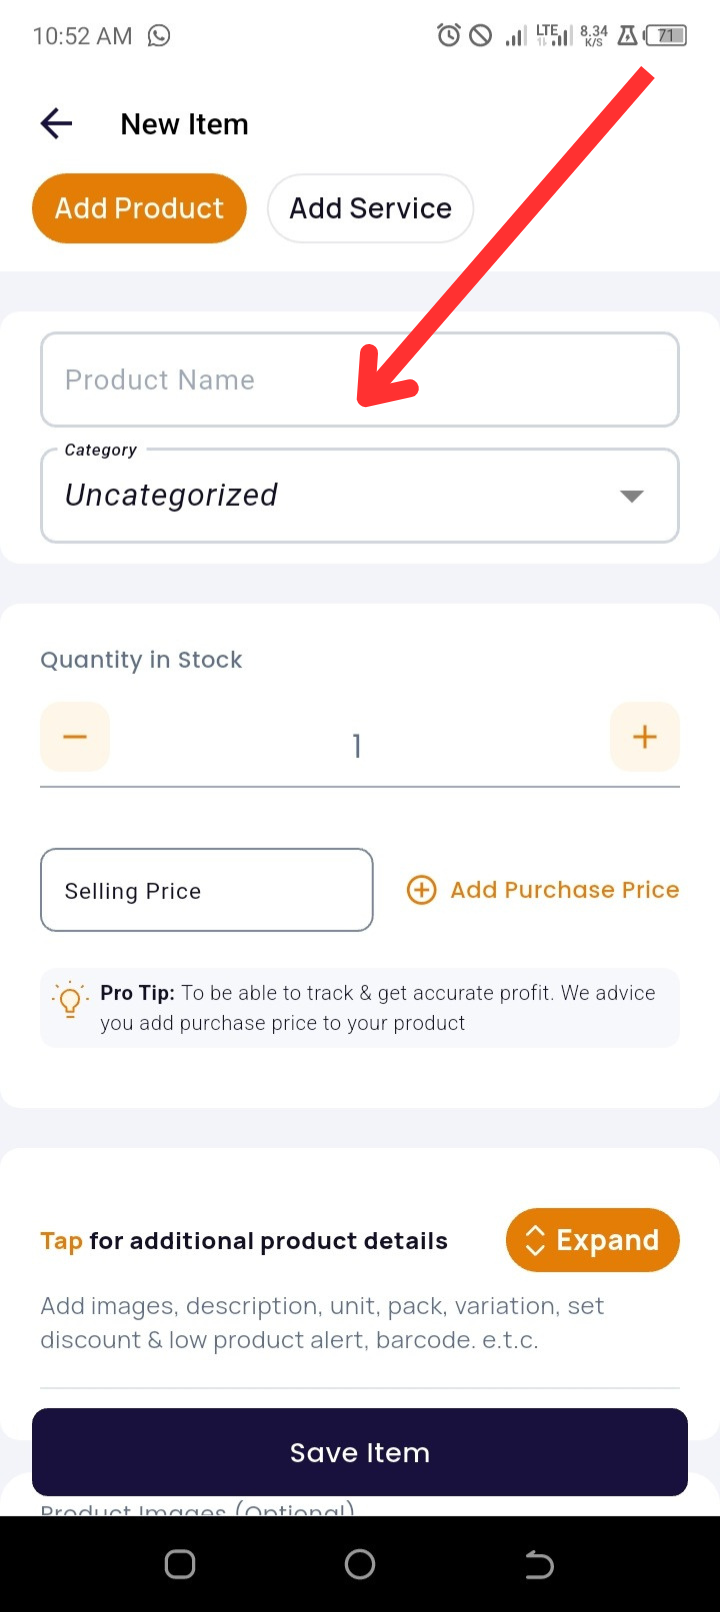
Enter the Product Name.
-
Select or create a Product Category (optional).
-
-
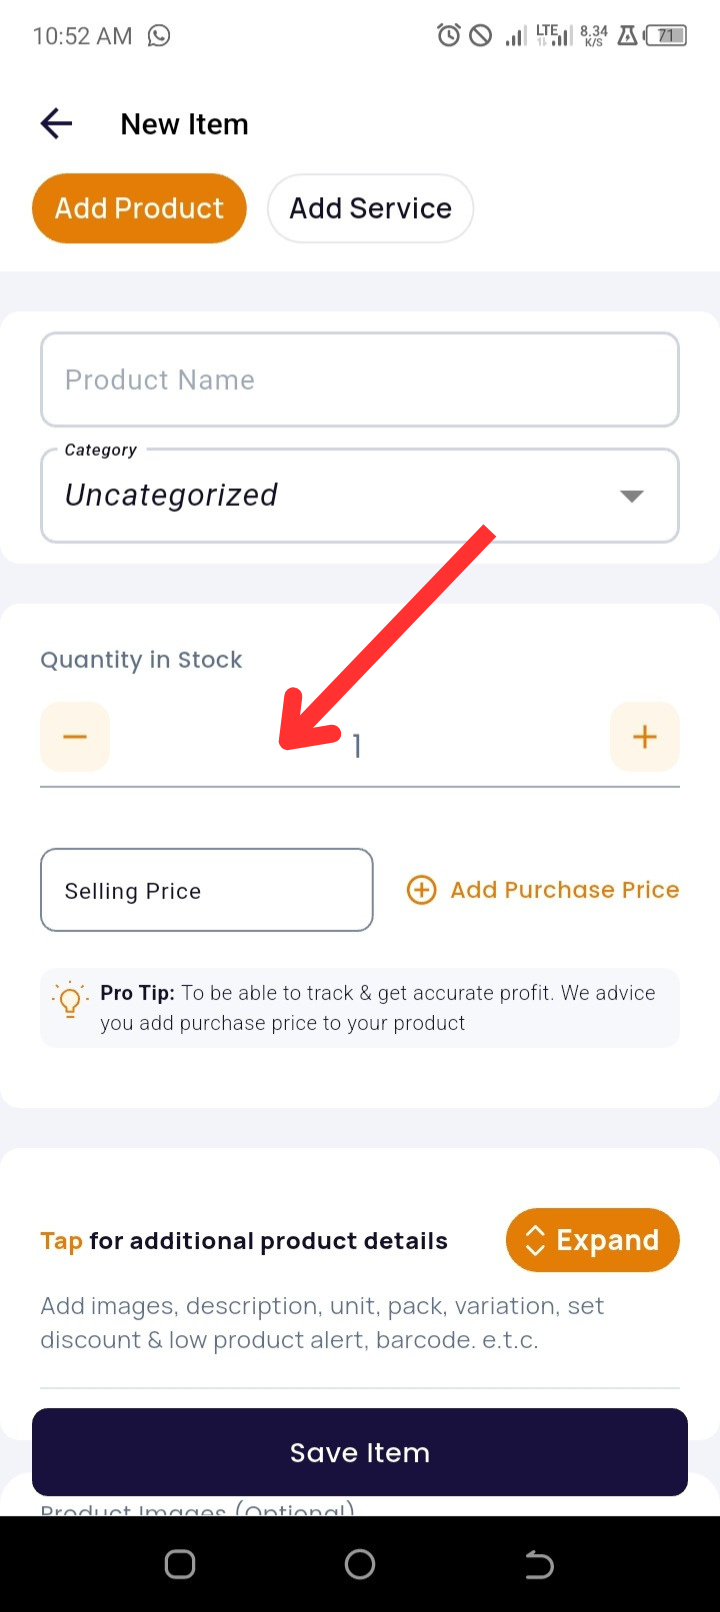
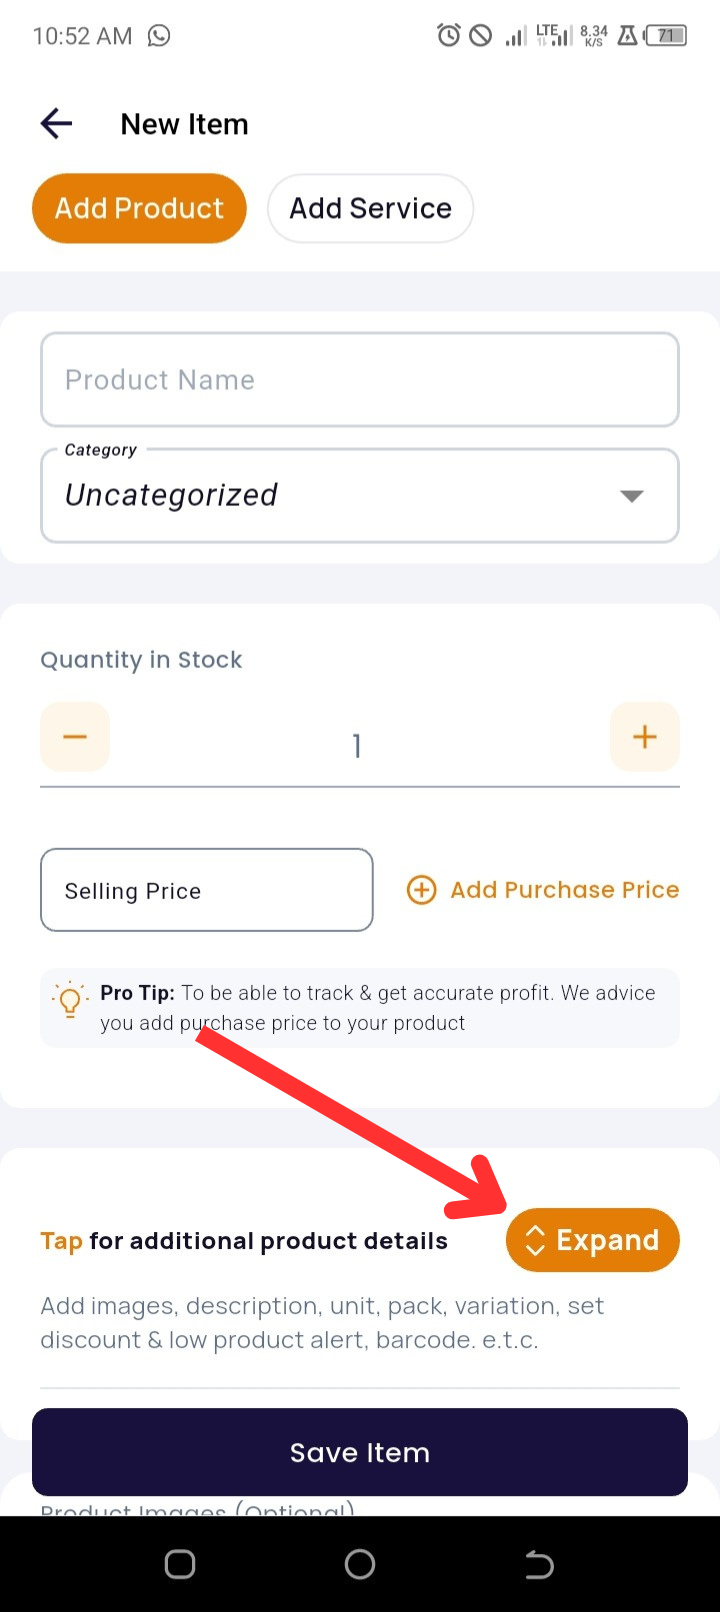
Provide the key details:
-
Quantity
-
Selling Price
-
Tap + Add Purchase Price (optional but important for profit analysis)
-
-
Tap Expand to fill in more data:
-
Sell in Pieces or Packs
-
Sell in Variations
-
Description
-
Unit of Measurement
-
Expiry Date
-
Low Stock Alert
-
Barcode
-
Enable Sell in Fractions (if needed)
-
-
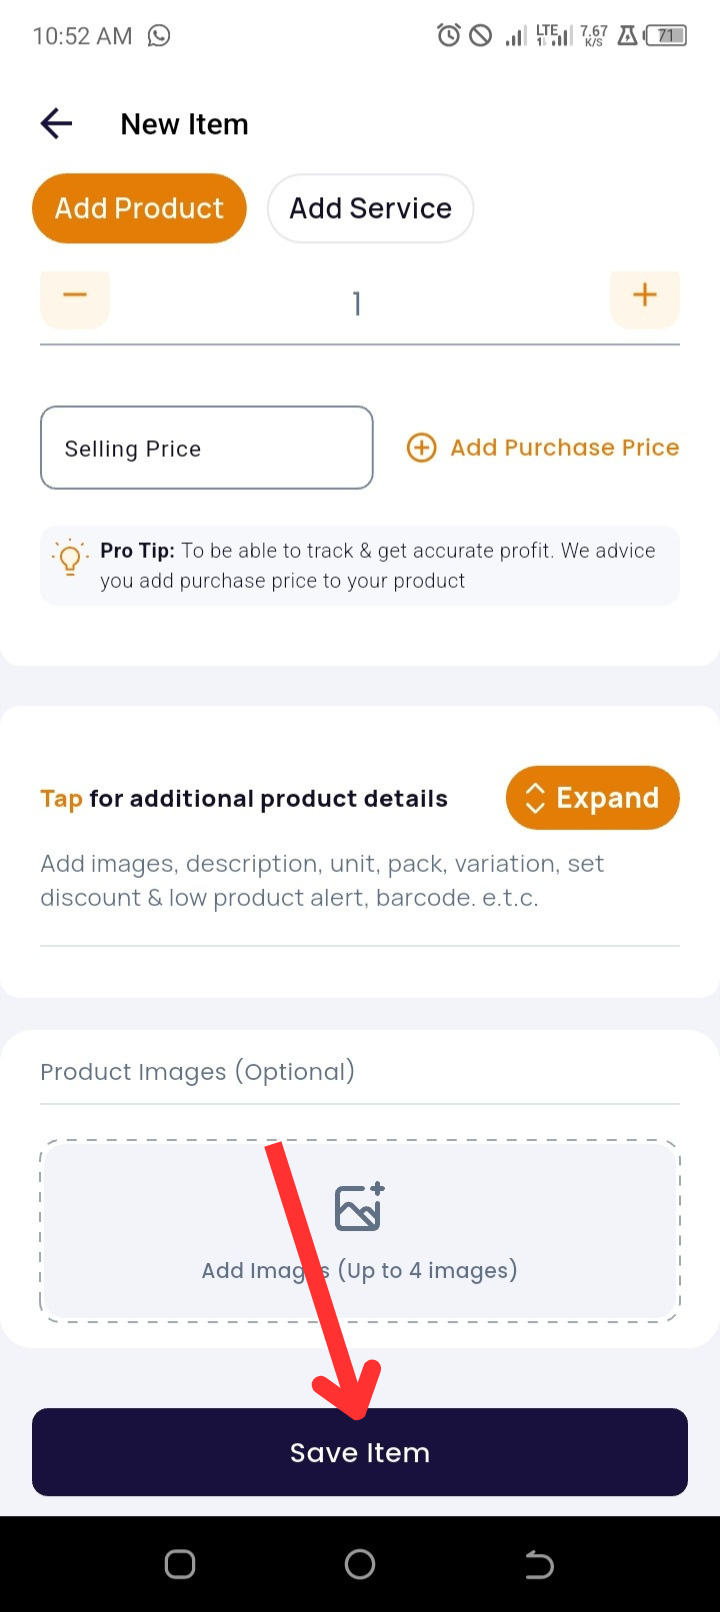
(Optional) Tap Add Images to upload visuals.
-
Tap Save Item to complete the process.
💡 Reminder: Always review your entries before saving to ensure accurate stock tracking.
🔧 Troubleshooting Tips
-
Can't Save your Item? Make sure all required fields (Product Name, Quantity, Selling Price) are filled.
-
Can’t See the Product? Double-check the category and search filters.
-
Images Not Uploading? Check your internet connection or try again later.
📌 Frequently Asked Questions (FAQs)
1. Do I need to add a purchase price for every product?
No, it’s optional but adding it helps track your profit margin more accurately.
2. Can I edit a product after saving it?
Yes, go to the Products Page, tap the product, and select Edit Item.
3. What if my product doesn’t have a barcode?
You can leave it blank or generate one using barcode tools available online.
4. How do I enable fractional selling?
While adding or editing a product, tap Expand, then toggle on Sell in Fractions.